
Buttermilk Fried Chicken Recipe
So you’re craving something crunchy, juicy, and wildly satisfying… but you also want to feel like a kitchen legend? Say less. Buttermilk fried chicken is that recipe. The one that makes people close their eyes after the first bite and go, “Whoa.” And no, you don’t need a secret Southern grandma to pull this off. You just need a bowl, some patience, and the willingness to get a little flour on your shirt. Totally worth it.
Let’s fry some happiness, shall we?
Why This Recipe is Awesome
First of all, it’s crispy on the outside and ridiculously juicy on the inside. That’s the dream combo. Crunch + tenderness = culinary magic.
Second, the buttermilk marinade? It doesn’t just sit there looking pretty. It tenderizes the chicken, adds flavor, and basically does all the hard work while you chill. IMO, that’s the kind of teamwork we love.
And finally, this recipe is surprisingly doable. It sounds fancy. It tastes restaurant-level. But the steps? Simple. If you can dip chicken in flour without launching it across the kitchen, you’re qualified.
Ingredients You’ll Need
Here’s your flavor squad:
- 1 kg chicken pieces (drumsticks, thighs, or whatever you love)
- 2 cups buttermilk (the magic potion)
- 2 teaspoons salt
- 1 teaspoon black pepper
- 1 teaspoon paprika (for that subtle smoky vibe)
- 1 teaspoon garlic powder
- 1 teaspoon onion powder
- ½ teaspoon cayenne pepper (optional, if you like drama)
- 2 cups all-purpose flour
- 1 tablespoon cornstarch (extra crisp, don’t skip it)
- Oil for deep frying (vegetable or canola works great)
Pro tip: Let the chicken marinate overnight if you can. The flavor goes from “nice” to “where has this been all my life?”
Step-by-Step Instructions
Marinate the chicken.
In a large bowl, mix buttermilk, salt, pepper, paprika, garlic powder, onion powder, and cayenne. Add the chicken and make sure every piece gets coated. Cover and refrigerate for at least 4 hours (overnight is better).
Prepare the flour mixture.
In another bowl, combine flour, cornstarch, and a pinch of salt and pepper. Mix well. This is your crispy armor.
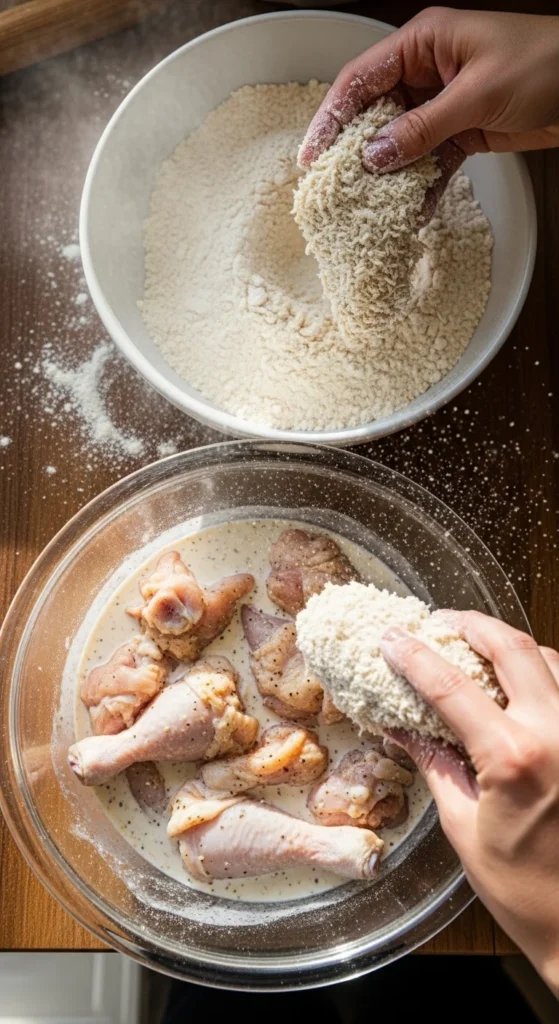
Coat the chicken.
Take each piece from the marinade and let the excess drip off. Dredge it in the flour mixture. Press the flour onto the chicken firmly. You want those craggy bits—that’s where the crunch lives.
Rest before frying.
Place coated chicken on a rack and let it sit for 10–15 minutes. This helps the coating stick. Yes, waiting is annoying. Do it anyway.
Heat the oil.
Heat oil in a deep pot to about 170–175°C (340–350°F). Use a thermometer if you have one. Too hot and the outside burns. Too cool, and it gets greasy.
Fry in batches.
Carefully lower a few pieces into the oil. Don’t overcrowd the pot. Fry for 12–15 minutes, turning occasionally, until golden brown and cooked through.
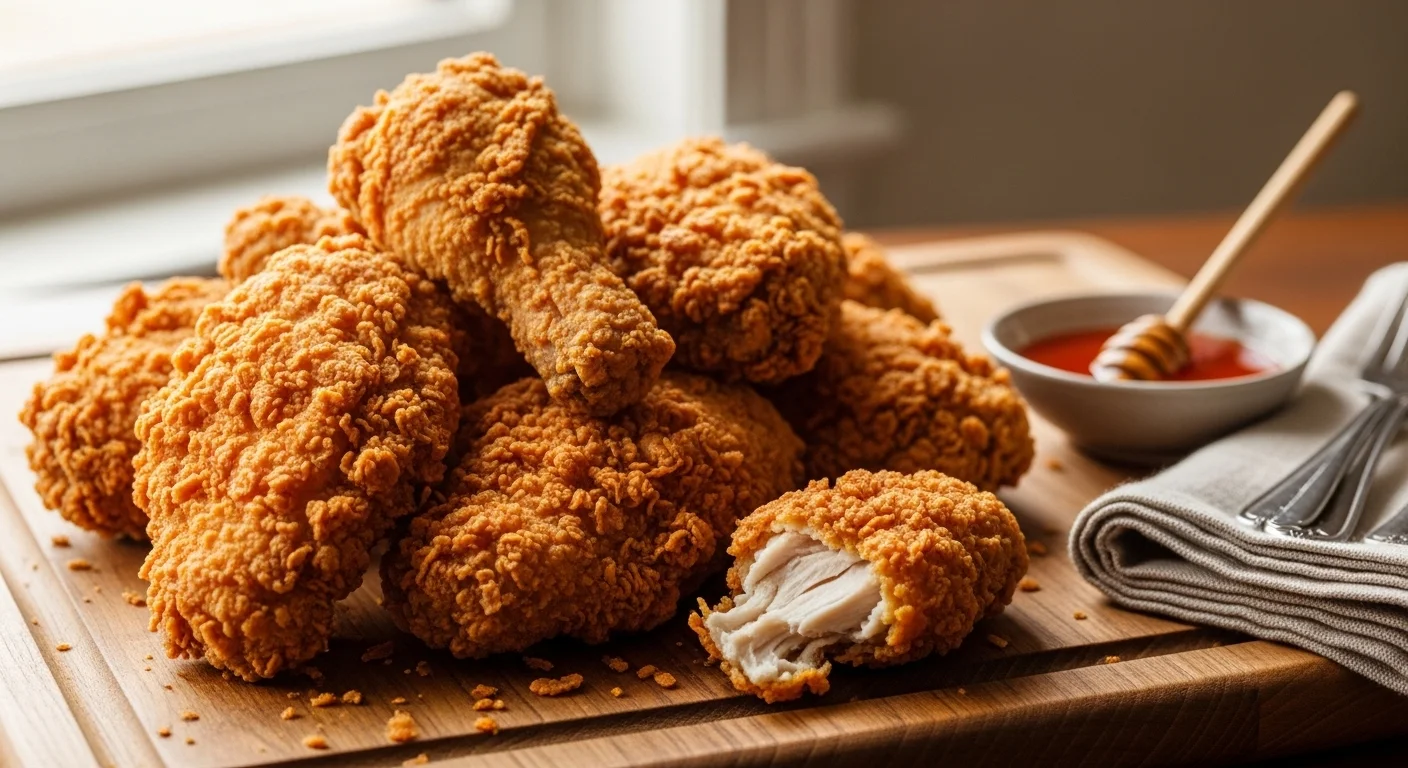
Drain and rest.
Place fried chicken on a wire rack (not paper towels if you want maximum crisp). Let it rest for 5–10 minutes before serving.
And boom. You just made buttermilk fried chicken like a boss.
Common Mistakes to Avoid
Let’s save you from heartbreak.
- Skipping the marinade time.
You can’t rush greatness. Two hours minimum. Overnight? Even better. - Not checking oil temperature.
Guessing doesn’t count. Oil that’s too hot will burn the crust before the inside cooks. Too cool? Greasy sadness. - Overcrowding the pot.
This isn’t a chicken spa. Give each piece space to fry properly. - Not seasoning the flour.
Bland coating = disappointment. Season every layer. - Cutting into it immediately.
Let it rest! The juices need a minute to settle. Trust the process.
Alternatives & Substitutions
- No buttermilk? Relax.
- Mix 2 cups of milk with 2 tablespoons of lemon juice or vinegar. Let it sit for 10 minutes. Boom—DIY buttermilk.
- Want it spicier? Add extra cayenne or a splash of hot sauce to the marinade.
- Prefer boneless? Use chicken tenders or boneless thighs. Just reduce the frying time.
- Trying to avoid deep frying? You can air fry it. Spray generously with oil and cook at 190°C (375°F) until crispy. It won’t be identical—but it’s still solid.
- Gluten-free? Swap regular flour with a gluten-free blend and add extra cornstarch for crunch.
Honestly, once you understand the technique, you can play around with flavors. Add smoked paprika, dried herbs, or even a little chili powder. Make it yours.
FAQ (Frequently Asked Questions)
Can I use regular milk instead of buttermilk?
Technically, yes… but it won’t be the same. Add lemon juice or vinegar to mimic buttermilk. Straight milk alone won’t tenderize the chicken as well.
How do I know the chicken is fully cooked?
Use a thermometer. The internal temperature should hit 75°C (165°F). No thermometer? Cut into the thickest part—no pink allowed.
Can I make it ahead of time?
Yes, but fried chicken shines fresh. Reheat in the oven at 180°C (350°F) to bring back the crisp. Microwave? Please don’t. You deserve better.
Why did my coating fall off?
You probably skipped resting time or didn’t press the flour firmly onto the chicken. Press it like you mean it.
Can I double-coat for extra crunch?
Absolutely. Dip the floured chicken back into buttermilk, then into flour again. Extra crispy? Yes. Extra messy? Also yes.
How long can I store leftovers?
Store in the fridge for up to 3 days. Reheat in the oven or air fryer to revive the crunch.
Final Thoughts
Buttermilk fried chicken isn’t just food. It’s an experience. It’s the sound of that first crunch. It’s the juicy bite that makes you forget table manners for a second. And the best part? You made it yourself. So go ahead—serve it at dinner, bring it to a gathering, or just make it on a random Tuesday because you feel like it. Life’s too short for boring meals. Now go impress someone—or yourself—with your new crispy masterpiece. You’ve earned it
Buttermilk Fried Chicken Recipe
Ingredients
Method
- Mix buttermilk with salt, pepper, paprika, garlic powder, onion powder, and cayenne; add chicken and refrigerate 4 hours or overnight.
- Combine flour, cornstarch, and a pinch of salt and pepper in a separate bowl.
- Remove chicken from marinade, let excess drip, then dredge in flour mixture, pressing coating firmly.
- Place coated chicken on a rack and rest 10–15 minutes for coating adherence.
- Heat oil in a deep pot to 170–175°C (340–350°F).
- Fry chicken in batches for 12–15 minutes, turning occasionally until golden brown and cooked through.
- Drain on a wire rack for 5–10 minutes before serving.
Notes
Check oil temperature for perfect crisp; avoid overcrowding the pot.
Extra crispy? Double-coat by dipping again in buttermilk and flour.
Store leftovers in the fridge up to 3 days; reheat in oven or air fryer for best results. ━━━━━━━━━━━━━━━━━━━━━━━━━━━━━━ DID YOU MAKE THIS EASY RECIPE? If you have, then share it with us by sending a photo. We’re excited to see what you’ve made:-)


