
Irresistible Chocolate Lava Cake Recipe Bliss

Irresistible Chocolate Lava Cake Recipe Bliss
Ingredients
Method
- Preheat oven to 200°C (390°F) and grease ramekins with butter then dust with cocoa powder.
- Melt dark chocolate and butter together until smooth and glossy.
- Whisk whole eggs, egg yolks, and sugar until pale and slightly thickened.
- Fold melted chocolate mixture and vanilla into egg mixture gently.
- Sift in flour and salt and fold just until combined.
- Divide batter evenly into prepared ramekins.
- Bake for 10–12 minutes until edges are set but centers remain soft.
- Rest cakes for 1 minute then carefully invert onto plates.
- Serve immediately while centers are molten and warm.
Notes
Do not overbake or the lava center will set.
You can prepare batter ahead and refrigerate up to 24 hours before baking.
Serve with vanilla ice cream or berries for contrast. DID YOU MAKE THIS EASY RECIPE?
If you have, then share it with us by sending a photo. We’re excited to see what you’ve made.
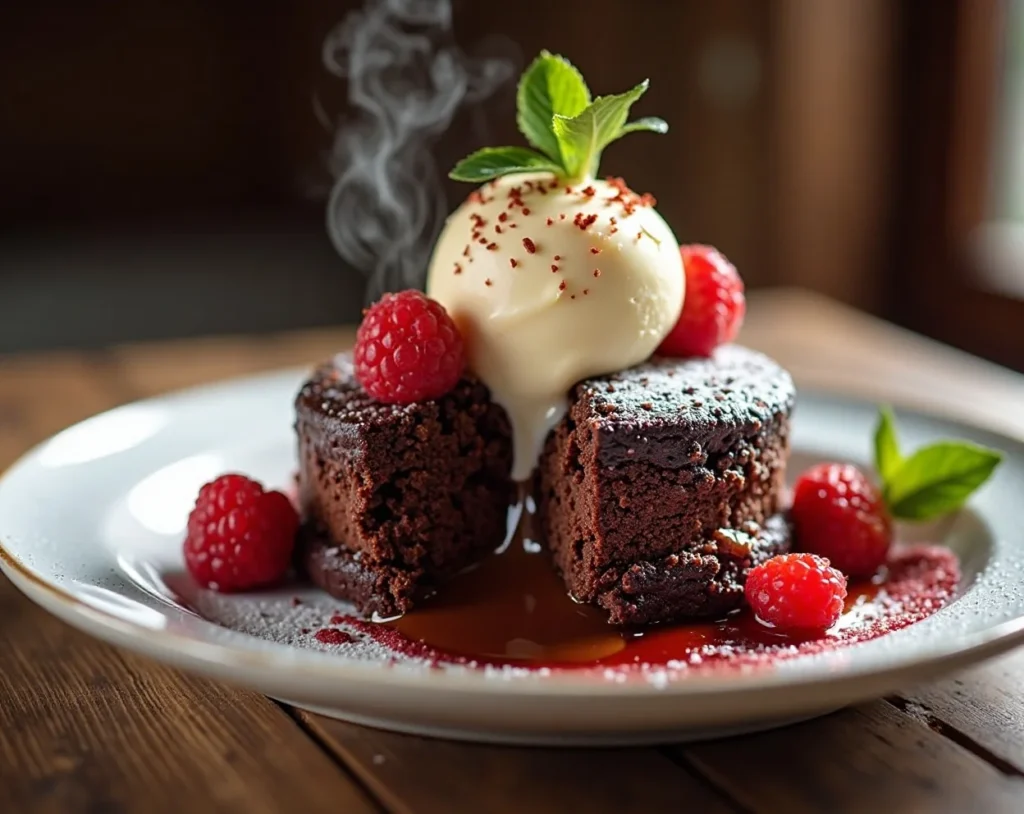
Look at this beauty — that moment when you cut into it and the molten chocolate just pours out like pure happiness? Yeah, we’re about to make that magic happen in your kitchen. A Fresh Chocolate Lava Cake with a Rich, Flowing Canter Stock …And another close-up because… why not drool a little more?
Why Chocolate Lava Cake Recipe is Awesome
This Chocolate Lava Cake (aka Molten Chocolate Cake) is basically the cheat code for looking like a fancy dessert wizard without actually being one.
You get that crisp exterior with an outrageously gooey, lava-like center that oozes out when you dig in. It’s rich, chocolatey, and stupidly impressive for something that takes like 30 minutes total.
Even if your baking skills are “I once burned toast,” this one’s pretty much idiot-proof — I mean, I’ve messed up way harder recipes and still nailed this. Plus, it’s perfect for date nights, girls’ nights, or just treating yourself because adulting is hard. Who needs therapy when there’s molten chocolate?
Ingredients You’ll Need
Grab these bad boys (makes 4 individual cakes — because sharing is overrated):
- 113g (½ cup / 1 stick) unsalted butter — the good stuff, no skimping here
- 113g high-quality dark chocolate (60-70% cocoa) — chopped or use good chips; cheap chocolate = sad lava
- 2 large eggs + 2 large egg yolks — yes, extra yolks for that silky richness
- 50g (¼ cup) granulated sugar — just enough sweetness
- 30g (¼ cup) all-purpose flour — sifted if you’re feeling fancy (you’re not, right?)
- Pinch of salt — because balance is key, even in decadence
- Butter + cocoa powder — for greasing the ramekins (trust me, don’t skip this)
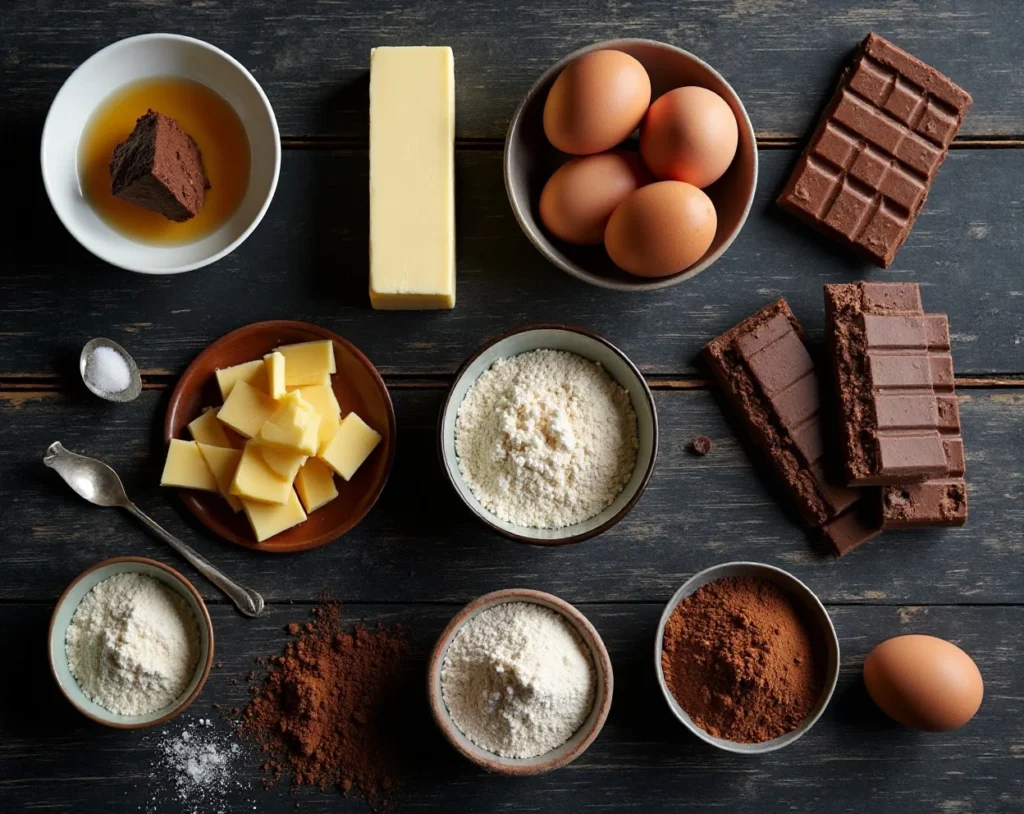
Optional extras: powdered sugar for dusting, vanilla ice cream, fresh berries… you know, the works.
Step-by-Step Instructions
- Preheat your oven to 425°F (220°C). Grease four 6-oz ramekins generously with butter, then dust with cocoa powder. Tap out excess. (Pro move: this prevents the “stuck cake tragedy.”)
- Melt the chocolate and butter together. Use a microwave in 20-second bursts, stirring between each, or do it over a double boiler. Get it nice and smooth — no lumps allowed.
- Whisk the eggs, yolks, and sugar in a bowl until thick and pale — about 1-2 minutes by hand (or 30 seconds with electric beaters). You’re basically making it fluffy-ash.
- Pour in the melted chocolate mixture and whisk until combined. Add the flour and salt, then gently fold/stir until just mixed. Don’t overmix — we want tender, not tough.
- Divide the batter evenly among the ramekins. Place them on a baking sheet (easier to handle).
- Bake for 11-13 minutes. The edges should look set, but the center should still jiggle like Jell-O when you gently shake the pan. That’s the magic lava zone!
- Let them rest for exactly 1 minute, then run a knife around the edges and invert onto plates. Tap gently if needed. Serve immediately while that centre is still gloriously gooey.
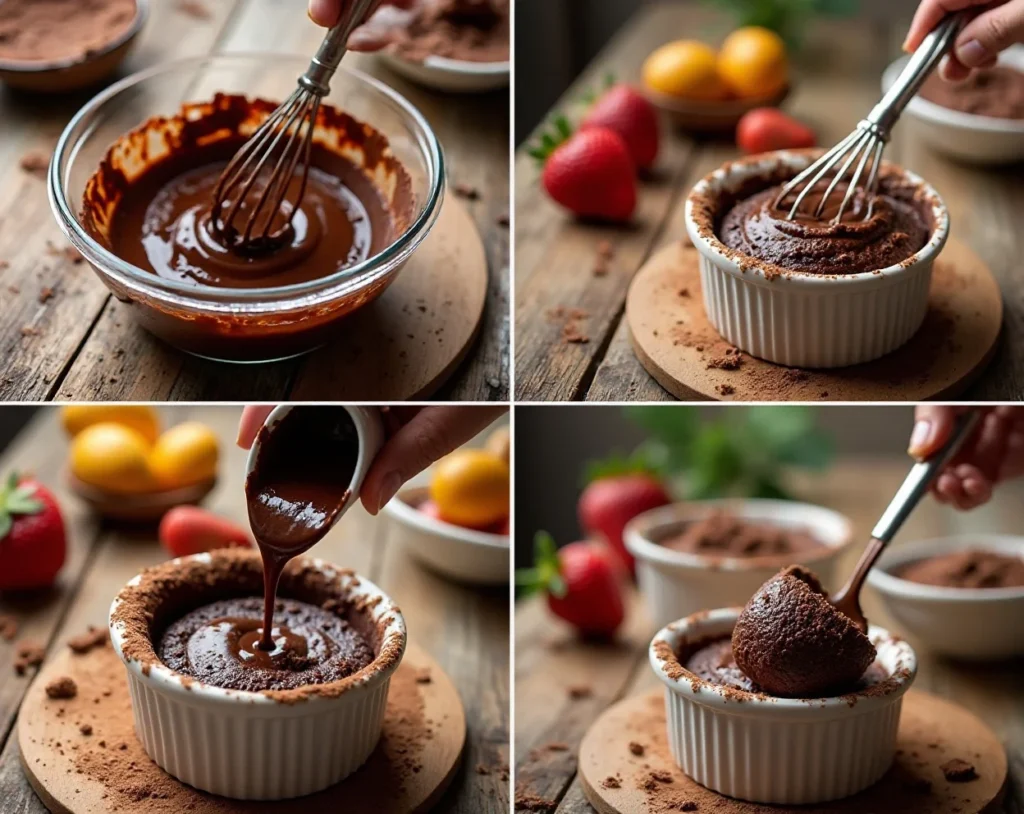
Check out this step-by-step vibe to see how it comes together:
Common Mistakes to Avoid
- Overbaking — the #1 killer. If it’s fully set in the middle, you’ve got a sad brownie instead of lava. Set a timer and watch like a hawk after 10 minutes.
- Skipping the grease + cocoa dust — your cake will glue itself to the ramekin like it’s in love. Rookie move.
- Using low-quality chocolate — it tastes… meh. Go for something you’d actually eat plain.
- Serving too late — the lava hardens as it cools. Strike while the iron (and chocolate) is hot!
Alternatives & Substitutions
- Gluten-free? Swap the flour for 1:1 gluten-free blend. Works like a charm.
- Dairy-free? Use vegan butter and dairy-free dark chocolate. Still epic.
- Want it extra fancy? Drop a square of chocolate or a spoonful of Nutella in the center before baking for double molten madness.
- No ramekins? Muffin tins work in a pinch (reduce time by 1-2 minutes).
- Boozy twist? A splash of espresso, Baileys, or Kahlua in the batter — chef’s kiss.
IMO, the classic is unbeatable, but experiment if you’re feeling wild.
FAQ (Frequently Asked Questions)
Can I make these ahead of time?
Yes! Prep the batter in the ramekins, cover, and refrigerate up to 24 hours. Bake straight from the fridge — add 1-2 extra minutes.
Is the center supposed to be undercooked?
YES! That’s the whole point — gooey molten goodness. If it’s cake all the way through, you waited too long.
Can I use margarine instead of butter?
Technically yes… but why hurt your soul like that? Butter gives way better flavor and texture.
How do I know when it’s done?
Edges set, center jiggles slightly. It’s a fine line — better slightly under than over.
Can I freeze them?
Bake and cool completely, then freeze. Reheat in microwave 20-30 seconds. The lava won’t be as perfect, but still delicious.
What if I don’t have ramekins?
Coffee mugs or small oven-safe bowls work — just adjust baking time slightly.
Why did mine explode?
Probably overfilled the ramekins or the oven was too hot. Stick to ¾ full max.
Final Thoughts
There you have it — your ticket to chocolate nirvana without selling your soul to complicated recipes.
This Chocolate Lava Cake turns “I can’t bake” into “Look what I made!” faster than you can say “more ice cream, please.”
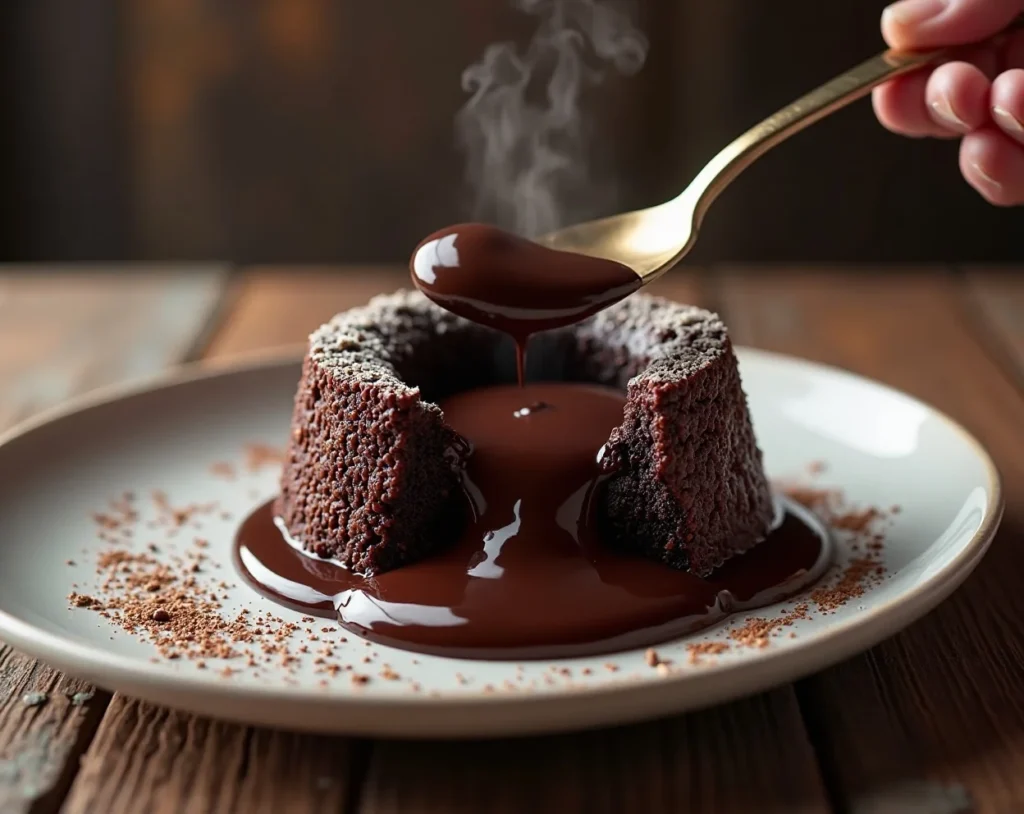
Now go forth, impress someone (or just yourself), and enjoy that glorious ooze. You’ve earned every molten bite. Tag me if you make it… or just eat it all in one sitting. No judgment here. 😏One more tempting shot to send you off — pure decadence:
You should also Try
Ultimate Mexican Barbacoa: Tender, Flavour-Packed Bliss!
Happy baking, friend! 🍫


