

10 DIY Christmas Cake Decorations
Hey, fellow baking enthusiast! Picture this: You’re staring at a plain cake, the holidays are knocking, and you want something that screams “festive” without spending hours or a fortune. Who hasn’t been there, right? These 10 DIY Christmas cake decorations hit that sweet spot—quick, creative, and totally doable even if your piping skills are more “enthusiastic amateur” than pro. Grab your apron, let’s chat about turning that cake into a merry masterpiece that’ll have everyone snapping pics.
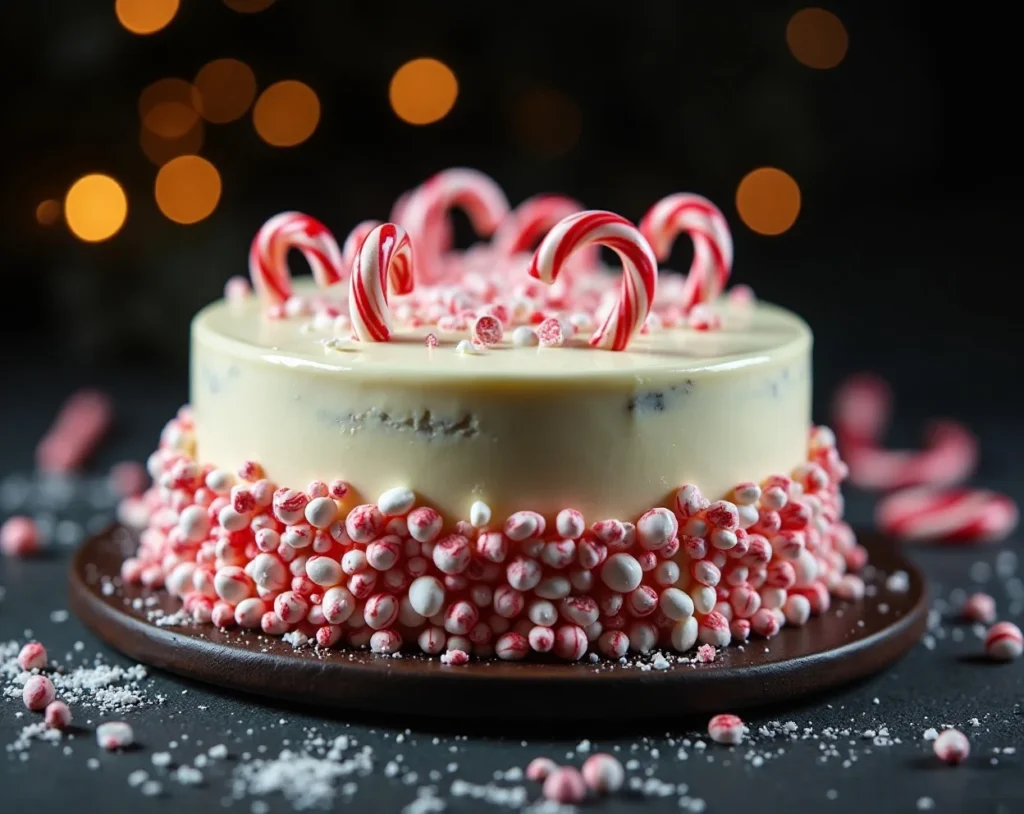
1. Candy Cane Crush Border
Crush those leftover candy canes and bam—you’ve got a sparkly, minty edge that adds crunch and colour in minutes. This one’s perfect for when you want festive vibes without the fuss; it hides any uneven frosting like a pro.
Ingredients
- 6-8 candy canes, unwrapped and ready to smash.
- 1 cup white chocolate chips, melted for sticking power.
- Red food coloring (optional, for extra pop).
Step-by-Step Instructions
- Zip the candy canes into a plastic bag and whack them with a rolling pin until you get chunky bits—aim for pebble-sized, not dust.
- Melt the white chocolate in the microwave, stirring every 20 seconds to avoid burns.
- Dip the cake’s edge into the chocolate, then roll it in the crushed candy—press gently so it sticks.
- Chill the cake for 10 minutes to set everything firm.
Why You’ll Love It
This decoration brings that classic peppermint punch without overwhelming the cake’s flavor—trust me, I tried it on a vanilla sponge once and it was holiday magic. It’s kid-friendly too; let them handle the smashing for some controlled chaos. Plus, it lasts days in the fridge, so prep ahead and relax.
2. Snowy Coconut Flake Drift
Scatter shredded coconut like fresh snow for an instant winter wonderland look—who needs fancy tools when nature’s confetti does the trick? It’s subtle, elegant, and fools everyone into thinking you slaved over it.
Ingredients
- 2 cups shredded coconut, unsweetened for that pure white vibe.
- 1/2 cup powdered sugar, for a light dusting.
- Edible silver glitter (just a sprinkle, don’t go overboard).
Step-by-Step Instructions
- Toast half the coconut lightly in a pan over medium heat—stir constantly to avoid burning.
- Frost your cake with white icing, keeping it smooth on top for the “snow” effect.
- Pile the untoasted coconut around the base and sprinkle the toasted bits on top for texture.
- Dust with powdered sugar and a dash of glitter—tap off excess for even coverage.
Why You’ll Love It
The coconut adds a tropical twist to Christmas, which sounds weird but works wonders on chocolate cakes—IMO, it’s the unexpected hero. I botched a batch once by over-toasting, and it turned “golden snow,” but hey, improvisation saved the day. Super affordable and zero waste if you repurpose leftovers in cookies.
3. Gingerbread Men Parade
Line up mini gingerbread cookies around the cake like they’re marching to the North Pole—adorable, edible, and a nod to tradition without baking from scratch. Skip the store-bought if you’re feeling bold, but honestly, who has time?
Ingredients
- 12-15 small gingerbread men cookies, homemade or grabbed from the aisle.
- Royal icing (1 cup powdered sugar mixed with 1 egg white and a splash of water).
- Cinnamon sticks for mini “logs” if you want extra flair.
Step-by-Step Instructions
- Pipe a thin line of royal icing around the cake’s base—think glue for your cookie army.
- Stand the gingerbread men upright, pressing them gently into the icing.
- Dot icing on their “hands” to connect them in a chain—let it dry for 15 minutes.
- Tuck cinnamon sticks between a few for that rustic touch.
Why You’ll Love It
These little guys bring nostalgia and spice that pairs killer with fruitcakes—last year, mine vanished before the cake did, talk about a crowd-pleaser. If you’re vegan, swap the egg white for aquafaba; I did once and no one noticed the difference. Easy to customize for dietary tweaks without losing the fun.
4. Holly Berry Fondant Accents
Roll out fondant leaves and berries for a classic holly sprig that looks pro but takes zero artistry skills. Red and green pops against any frosting—festive without the fruitcake commitment.
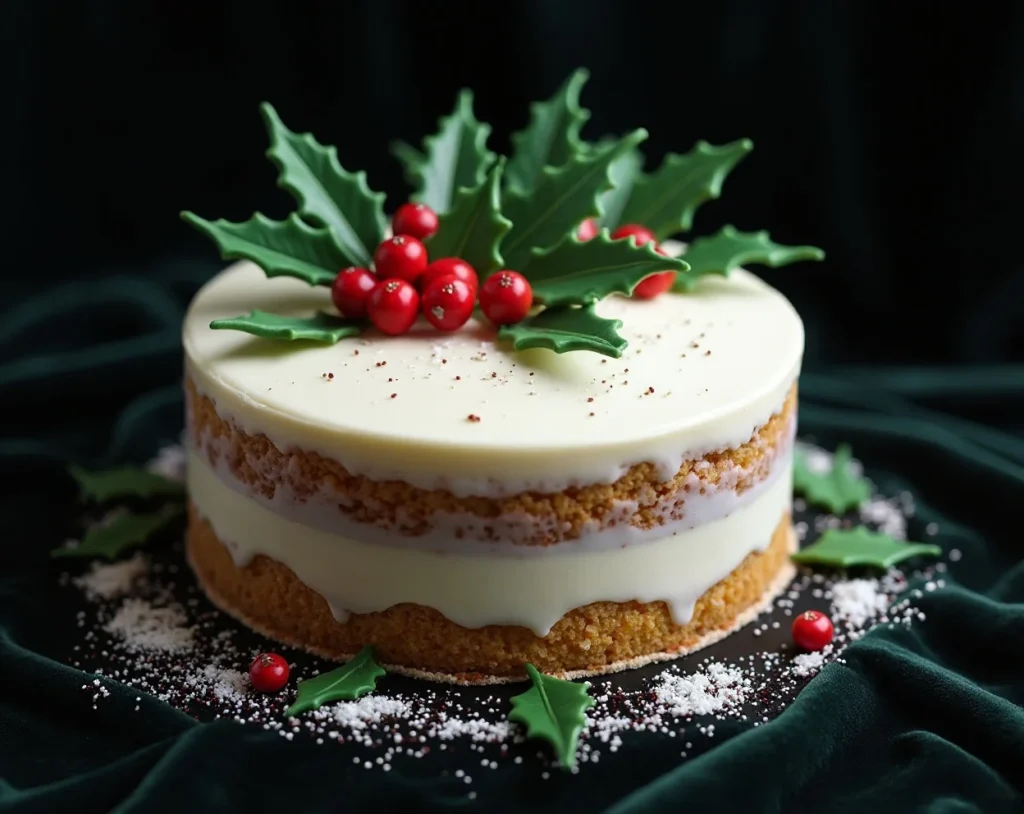
Ingredients
- Green fondant (1/2 pound, pre-colored or dye your own).
- Red fondant balls (small, about 20 pea-sized).
- Cornstarch for dusting to prevent sticking.
Step-by-Step Instructions
- Dust your surface with cornstarch and roll the green fondant thin—cut leaf shapes with a knife or cookie cutter.
- Pinch the red fondant into tiny berries—roll them smooth between your fingers.
- Arrange leaves in clusters on the cake top, securing with a dab of water.
- Nestle berries in the centers—press lightly and let set for 20 minutes.
Why You’ll Love It
Fondant gives that polished look, but it’s forgiving if you mess up—reshape and retry, no biggie. I swapped red for gold berries once for a glam twist, and it elevated a simple pound cake to party status. Gluten-free friendly too, which saved my bacon at a mixed-diet gathering.
5. Edible Christmas Tree Topper
Stack sugar cones with green frosting for a mini tree that crowns your cake—add sprinkles for ornaments, and watch the oohs and ayahs roll in. It’s interactive; kids love “decorating” it.
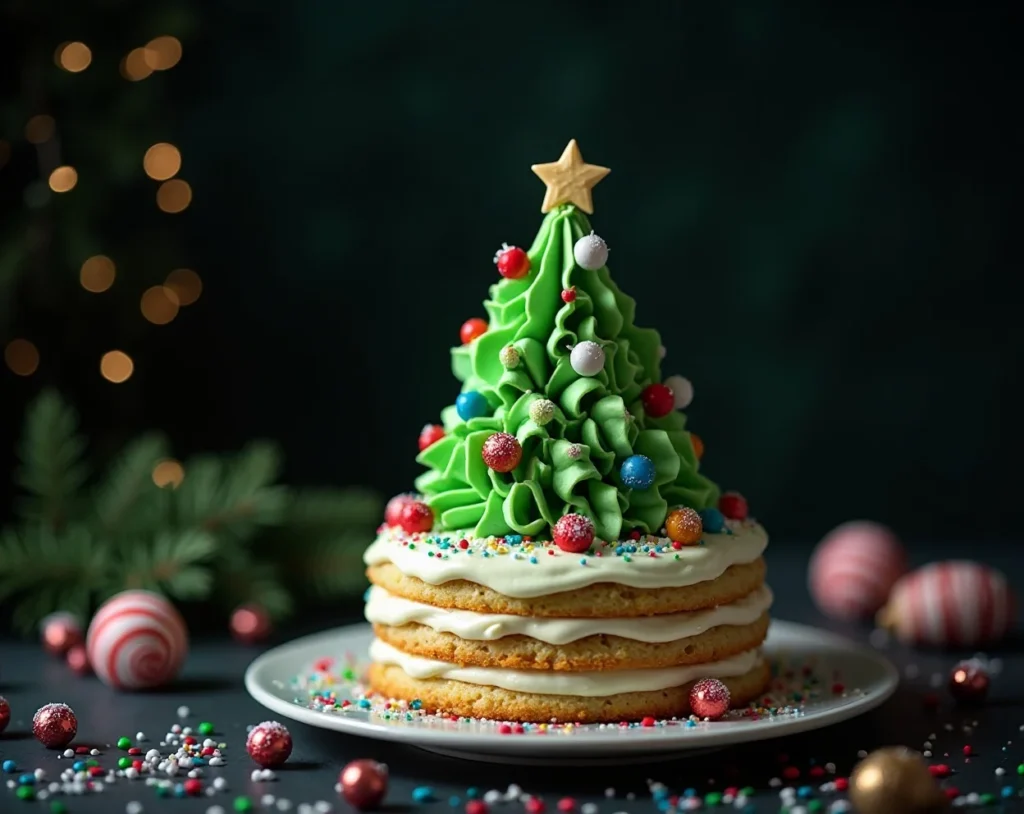
Ingredients
- 3-4 sugar cones, upside down for tree shapes.
- Green buttercream frosting (1 cup, tinted with food colouring).
- Assorted sprinkles and edible stars for bling.
Step-by-Step Instructions
- Pipe green frosting in swirls around each cone, starting from the base up.
- Stack cones if you want height—secure with a toothpick hidden inside.
- Press sprinkles into the wet frosting for instant ornaments.
- Place atop the cake and add a star sprinkle at the peak.
Why You’ll Love It
This topper turns any cake into a centerpiece—FYI, it works on cupcakes too for mini versions. I overdid the stacking once and it toppled, but a quick fix with extra frosting turned it into “avalanche art.” Budget-friendly and zero baking required, pure win.
6. Sparkly Sugar Star Scatter
Cut stars from coloured sugar sheets or sprinkle coarse sugar for a twinkly night sky effect—who knew basic sugar could mimic the Milky Way on a cake? Keep it random for that handmade charm.

Ingredients
- Coarse sanding sugar (1/2 cup each in gold and silver).
- Star cookie cutters (small sizes for variety).
- Edible glue or light corn syrup for adhesion.
Step-by-Step Instructions
- Brush corn syrup lightly on the cake where stars will go—don’t soak it.
- Press cookie cutters into the sugar on parchment, then lift and place on the cake.
- Scatter loose sugar around for a starry backdrop.
- Let dry for 10 minutes to avoid smudges.
Why You’ll Love It
The sparkle catches every light, making photos pop—perfect for Instagram holidays. Some folks skip the cutters and freehand, but I say tools make it foolproof; tried without once and ended up with blobs :/. Vegan and allergen-free, so everyone digs in.
7. Reindeer Chocolate Antler Silhouettes
Melt chocolate into antler shapes and stick them on for Rudolph’s crew—funny, chocolatey, and a hit with the little ones. Pair with red M&M noses for full effect.
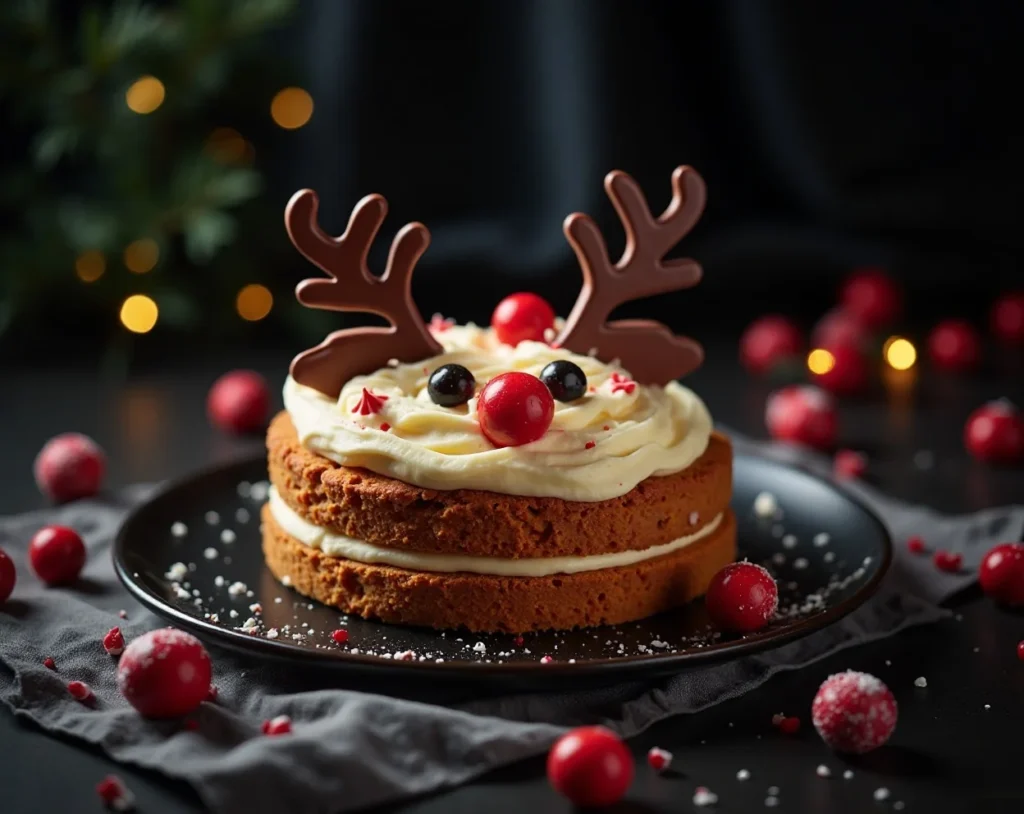
Ingredients
- Dark chocolate bars (8 oz, melted).
- Piping bag or ziplock with corner snipped.
- Pretzel sticks for backup antlers if chocolate fails.
Step-by-Step Instructions
- Melt chocolate in a double boiler, stirring until smooth.
- Pipe antler shapes onto wax paper—zigzag for branches.
- Chill in the fridge for 5 minutes to harden.
- Gently insert into the cake sides, angling for drama.
Why You’ll Love It
Chocolate adds richness without extra sweetness overload—tried white chocolate once, but dark wins for contrast. It’s a quick fix for plain cakes; my niece “helped” and we had wonky antlers, but the laughs made it memorable. Melts in your mouth, not in transit if you chill well.
8. Festive Ribbon Buttercream Swirls
Pipe buttercream in red and white stripes like gift ribbons—twisty, colourful, and way easier than fondant bows. Add a tag sprinkle for that wrapped present illusion.
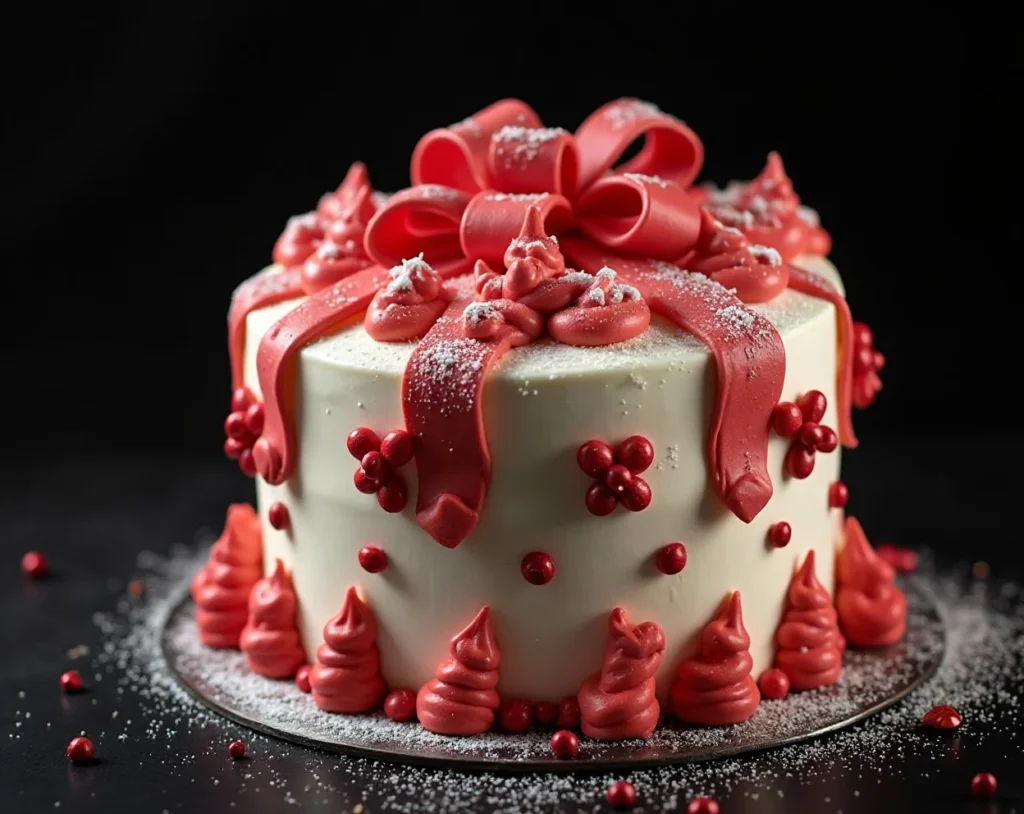
Ingredients
- Buttercream frosting (2 cups, divided and colored red/white).
- Piping bags with round tips.
- Edible gold dust for a shiny finish.
Step-by-Step Instructions
- Fill separate bags with red and white frosting.
- Pipe alternating stripes across the cake top, crossing for ribbon effect.
- Swirl ends into loops for bows—practice on paper first.
- Dust with gold for holiday gleam.
Why You’ll Love It
Buttercream’s creamy texture beats dry fondant every time—personal bias, but try it and see. I messed up the colors once and got pink ribbons; called it “Valentine preview” and rolled with it. Customizable for any theme, and leftovers make great cookie toppers.
9. Poinsettia Flower Piping
Pipe red petals with a leaf tip for bold poinsettias—vibrant, seasonal, and impresses without needing flower nails. Centre with yellow sprinkles for authenticity.
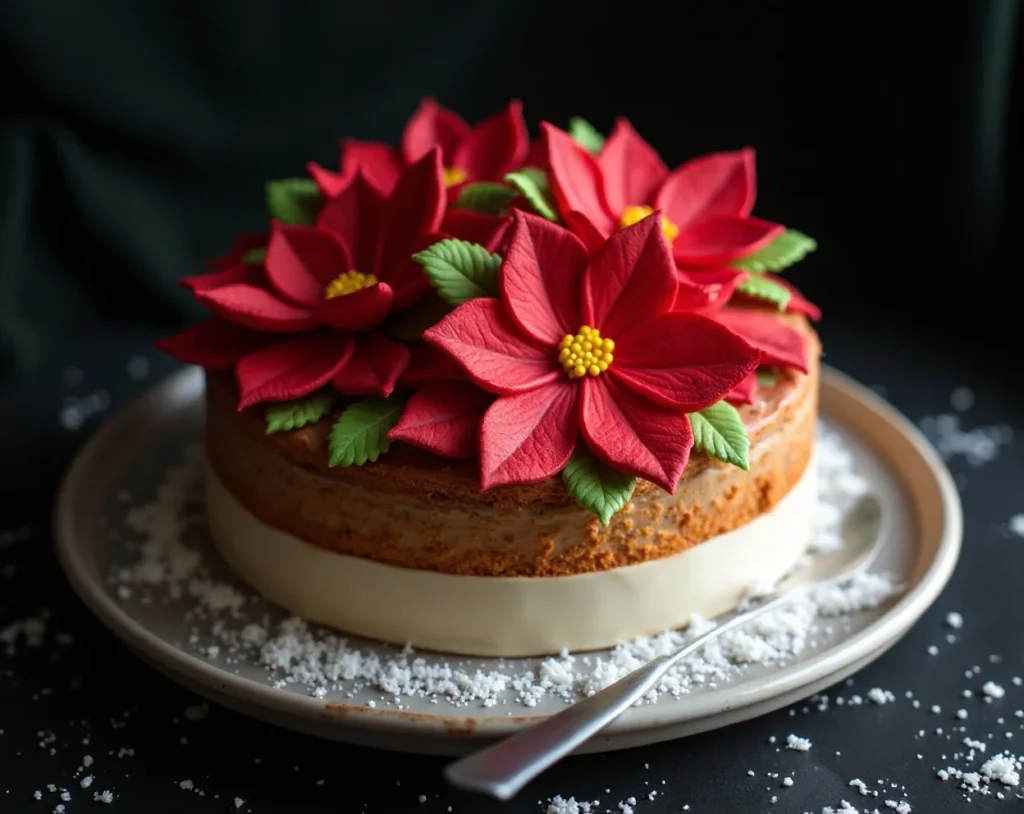
Ingredients
- Red royal icing (1 cup, stiff consistency).
- Piping bag with leaf tip #352.
- Yellow nonpareils for the centers.
Step-by-Step Instructions
- Hold the bag at 45 degrees and pipe overlapping petals in a circle.
- Build layers for dimension—start wide, narrow in.
- Dot yellow sprinkles in the middle while wet.
- Allow 30 minutes to firm up before handling.
Why You’ll Love It
These flowers scream Christmas elegance on a budget—way better than store-bought toppers. Over-piped once and it looked like a rose explosion, but thinning the icing fixed future batches. Egg-free options exist, keeping it inclusive for all.
10. Mistletoe Marzipan Leaves
Shape marzipan into leaves and berries for hanging mistletoe clusters—sweet, almond, and a sneaky way to add flavour. Hang ‘elm over the edge for that dangling kiss vibe.
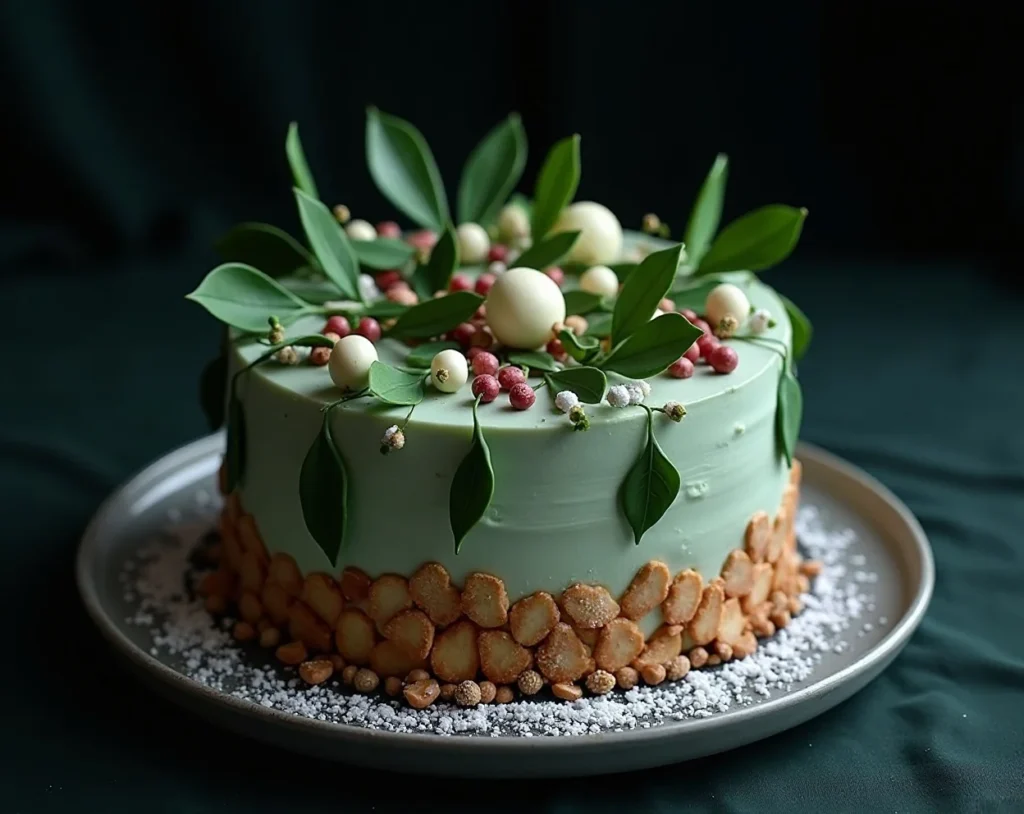
Ingredients
- Marzipan paste (1 pound, for molding).
- Green and white food coloring (for leaves and berries).
- Toothpicks for securing.
Step-by-Step Instructions
- Knead green coloring into most of the marzipan, roll flat, and cut leaf shapes.
- Roll white marzipan into small berries—texture with a fork.
- Cluster leaves and berries on toothpicks, insert into cake.
- Drape a few over the sides for movement.
Why You’ll Love It
Marzipan’s nutty taste elevates simple cakes—tried it on lemon and it was zingy heaven. Nut allergies? Swap for fondant; I did for a friend and it still charmed. Lasts weeks, so make extras for gifting.
There you have it—10 DIY Christmas cake decorations that pack festivity without the stress. Mix and match ‘elm for your ultimate holiday bake; they’re quick, creative, and guaranteed to spark joy (and maybe a few compliments). Which one will you tackle first? Happy decorating! 😊
You Should also Try :10 Easy Fall Cocktails You Can Make in Big Batches


