
Frozen Peanut Butter Nutella Cups Recipe
So you want dessert… but you also don’t want to bake, measure seventeen things, or turn your kitchen into a disaster zone? Same here. That’s exactly where these Frozen Peanut Butter Nutella Cups come in — the lazy genius of desserts.
They’re creamy, chocolatey, slightly salty, dangerously addictive, and require basically zero cooking skills. Honestly, if you can stir and freeze things, congratulations — you’re already qualified.
Let’s make something that tastes like it came from a fancy dessert shop but secretly took you almost no effort. Our little secret. 🤫
Why This Recipe is Awesome
Let me count the ways this recipe saves your dessert-loving soul:
- No baking required. Your oven gets a day off.
- Only a few ingredients. No weird items you’ll never use again.
- Freezer-friendly magic. Make a batch and snack all week.
- Perfect sweet + salty combo. Peanut butter and Nutella are basically best friends.
- It’s almost impossible to mess up. Seriously — even distracted smackers succeed.
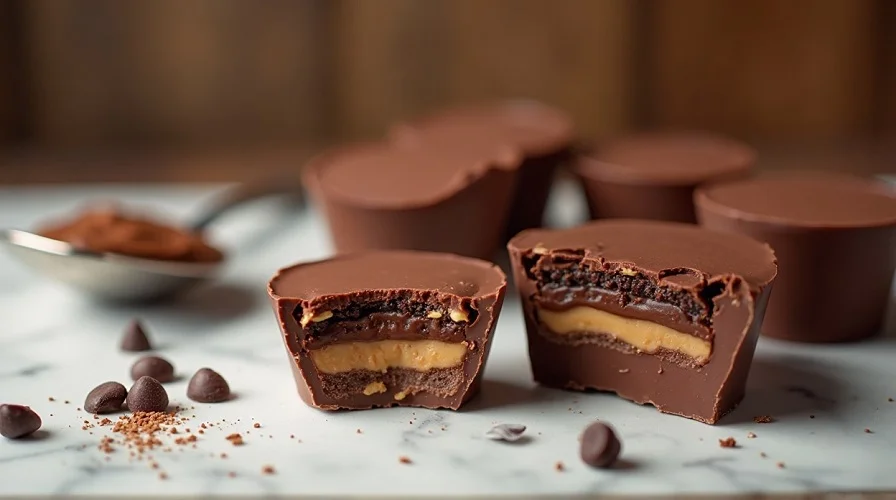
These cups taste like a frozen peanut butter cup levelled up with Nutella’s chocolate-hazelnut goodness. IMO, they’re dangerously better than store-bought candy.
And the best part? You look like a dessert genius with minimal effort. Win-win.
Ingredients You’ll Need
Here’s your short and sweet shopping list:
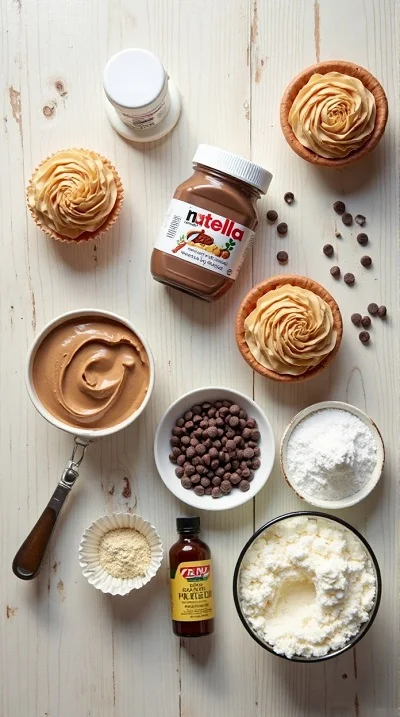
- Creamy peanut butter – The star of the show. Use smooth unless you enjoy chaos.
- Nutella – Chocolate hazelnut happiness in a jar.
- Dark or milk chocolate chips – Your outer shell of glory.
- Coconut oil – Helps the chocolate melt smoothly (aka chocolate glow-up).
- Powdered sugar – Adds sweetness and structure.
- Vanilla extract – Optional but makes everything taste fancier.
- Mini cupcake liners – Because nobody wants sticky fingers before dessert time.
Simple ingredients. Maximum reward.
Step-by-Step Instructions
- Prepare Your Pan Line a muffin tin with mini cupcake liners. This keeps everything neat and makes removal ridiculously easy later. Trust me — skipping liners equals regret.
- Melt the Chocolate Combine chocolate chips and coconut oil in a microwave-safe bowl. Heat in 20-second intervals, stirring each time until smooth. Pro tip: Don’t overheat. Burnt chocolate smells like broken dreams.
- Create the Chocolate Base Spoon about 1 teaspoon of melted chocolate into each liner. Tilt or tap the pan gently so the chocolate spreads across the bottom. Place the tray in the freezer for about 10 minutes until firm.
- Make the Peanut Butter Filling In a bowl, mix peanut butter, powdered sugar, and vanilla extract until smooth and slightly thick. You’re aiming for a texture similar to soft cookie dough — creamy but scoop able.
- Add the Peanut Butter Layer Remove the tray from the freezer and add a small spoonful of peanut butter mixture to each cup. Flatten slightly with the back of a spoon. Leave a little space at the top for more chocolate.
- Nutella Time Add a small dollop of Nutella on top of the peanut butter layer. Try not to eat half of it straight from the spoon. (No judgment if you do.)
- Seal with Chocolate Pour remaining melted chocolate over each cup until fully covered. Tap the tray gently to smooth the tops.
- Freeze Until Firm Freeze for 30–45 minutes or until completely set. Once solid, peel off the liners and admire your masterpiece before devouring.
Common Mistakes to Avoid
Let’s prevent dessert disasters, shall we?
- Overfilling the cups. They’re treats, not skyscrapers.
- Skipping the freezing step between layers. Patience = pretty layers.
- Using natural peanut butter without mixing well. Oil separation equals messy filling.
- Burning the chocolate. Microwave slowly — this is not a race.
- Eating them before fully frozen. You’ll get goo instead of perfect bites.
- Remember: slow and steady makes prettier cups.
- Alternatives & Substitutions
- Because sometimes your pantry has its own personality.
- No Nutella? Use any chocolate spread or melted chocolate instead.
- Need dairy-free? Choose dairy-free chocolate chips — easy swap.
- Crunch lover? Use crunchy peanut butter for texture.
- Healthier-is option: Swap powdered sugar for maple syrup (texture will be softer but still tasty).
- Want extra drama? Add crushed pretzels or chopped nuts between layers.
FYI: White chocolate topping also works and looks fancy with basically zero extra effort.
You Should Try Our Best Peanut Butter Nutella Swirl Brownies Recipe
FAQ (Frequently Asked Questions)
Can I store these at room temperature?
Technically yes… for about five minutes before they melt into chaos. Keep them frozen or refrigerated.
How long do they last in the freezer?
Up to 2 weeks — though realistically they disappear within days.
Can I make them without cupcake liners?
You can, but removing them becomes a wrestling match. Liners save sanity.
Can I use almond or cashew butter instead?
Absolutely! Any creamy nut butter works. Flavour changes slightly but still delicious.
Why is my chocolate cracking?
Your filling was too cold when adding warm chocolate. Let layers sit for a minute before pouring.
Can kids help make these?
Yes! This is basically a perfect beginner recipe. Just supervise the melting step.
Are these overly sweet?
Surprisingly no. The peanut butter balances the sweetness nicely — sweet but not toothache-level.
Final Thoughts
These Frozen Peanut Butter Nutella Cups prove one important life lesson: amazing desserts don’t need complicated recipes or professional skills. Sometimes the best treats come from simple ingredients, a freezer, and a strong love for chocolate.
They’re perfect for late-night cravings, surprise guests, or those “I deserve dessert today” moments (which, honestly, is every day).
So go ahead — make a batch, stash them in your freezer, and enjoy having instant happiness ready whenever you need it.
Now go impress someone — or just yourself — with your new no-bake dessert skills. You’ve absolutely earned it. 🍫🥜
Frozen Peanut Butter Nutella Cups Recipe
Ingredients
Method
- Line a mini muffin tray with cupcake liners.
- Melt chocolate chips with coconut oil in the microwave in 20-second intervals, stirring until smooth.
- Spoon 1 teaspoon melted chocolate into each liner and spread evenly to form the base.
- Freeze for 10 minutes until firm.
- Mix peanut butter, powdered sugar, and vanilla extract in a bowl until smooth.
- Add a small spoonful of peanut butter mixture over the chocolate base and flatten gently.
- Place a small dollop of Nutella on top of the peanut butter layer.
- Cover each cup with remaining melted chocolate until fully sealed.
- Tap the tray lightly to smooth the tops.
- Freeze for 30–45 minutes or until completely firm.
- Remove liners and serve chilled or store in the freezer.
Notes
• Do not overheat chocolate to avoid burning or grainy texture.
• Store cups in an airtight container in the freezer for up to 2 weeks.
• Allow cups to sit at room temperature for 2–3 minutes before eating for best texture.
• Crunchy peanut butter or chopped nuts can be added for extra texture.


