

Addictive Red Velvet Cake Love Recipe
Addictive Red Velvet Cake Love Recipe
Ingredients
Method
- Preheat oven to 175°C (350°F) and grease two round cake pans.
- Whisk flour, cocoa powder, baking soda, and salt in a bowl.
- In another bowl, beat sugar, oil, and eggs until smooth.
- Mix in buttermilk, food coloring, vanilla, and vinegar.
- Gradually combine dry ingredients into wet mixture until batter is smooth.
- Divide batter evenly into pans and bake 25–30 minutes.
- Cool cakes completely before frosting.
- Beat cream cheese and butter until creamy, then add powdered sugar.
- Frost and layer the cake, covering top and sides evenly.
Notes
Do not overmix the batter to keep the cake tender.
Chill the cake slightly before slicing for clean layers.
Store refrigerated up to 4 days for best freshness. DID YOU MAKE THIS EASY RECIPE? If you have, then share it with us by sending a photo. We’re excited to see what you’ve made.
Hey, you! Yeah, you with the sudden craving for something ridiculously red, velvety, and covered in tangy cream cheese frosting.
I get it. Sometimes life calls for cake that basically screams “Treat yourself, you magnificent human.” And this classic red velvet cake? It’s the one that answers the call every single time. No fancy chef skills needed—just a little love, some red food colouring, and the willingness to lick the bowl (no judgment here).
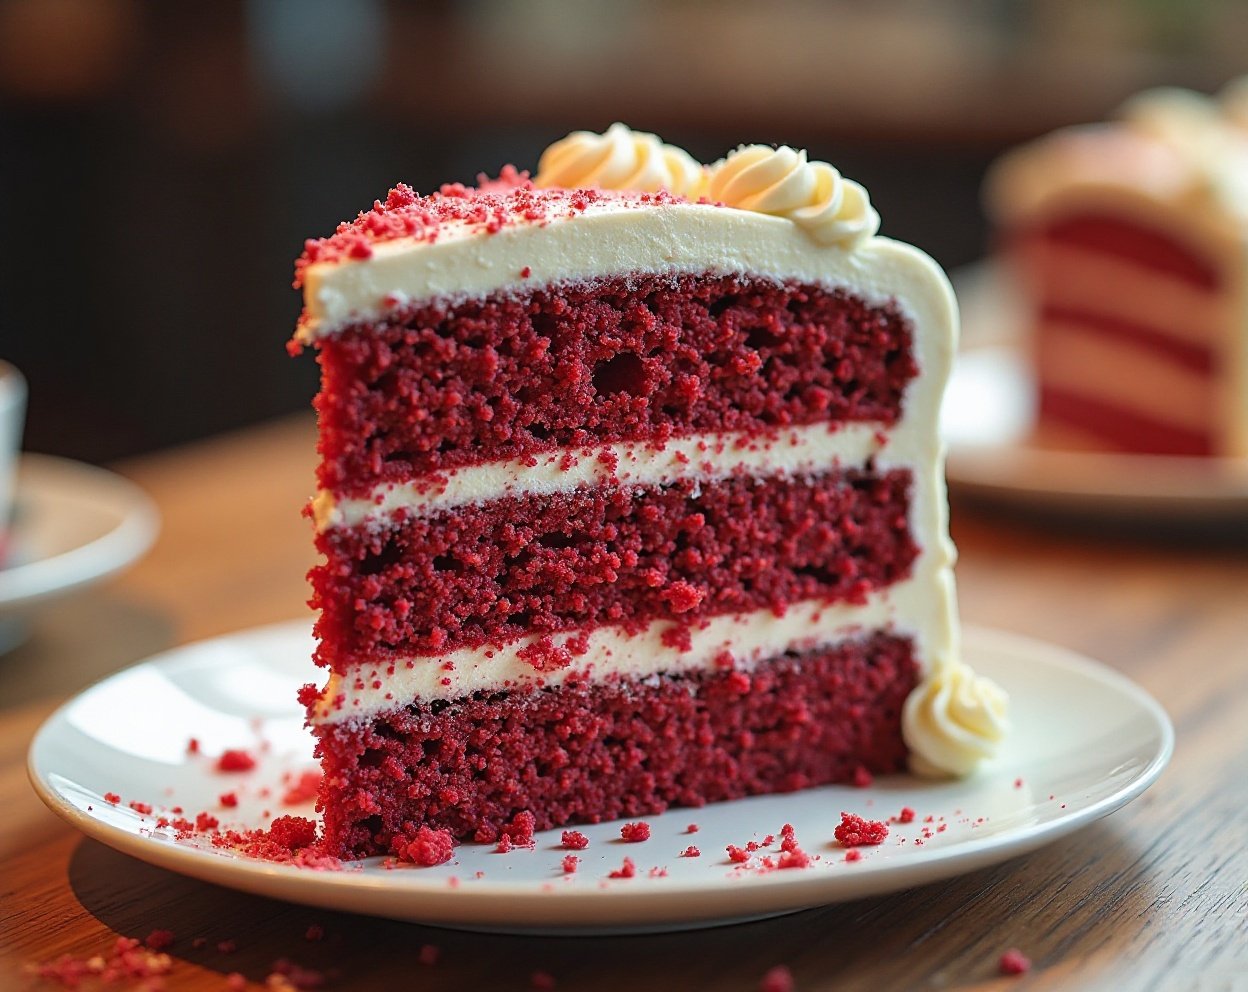
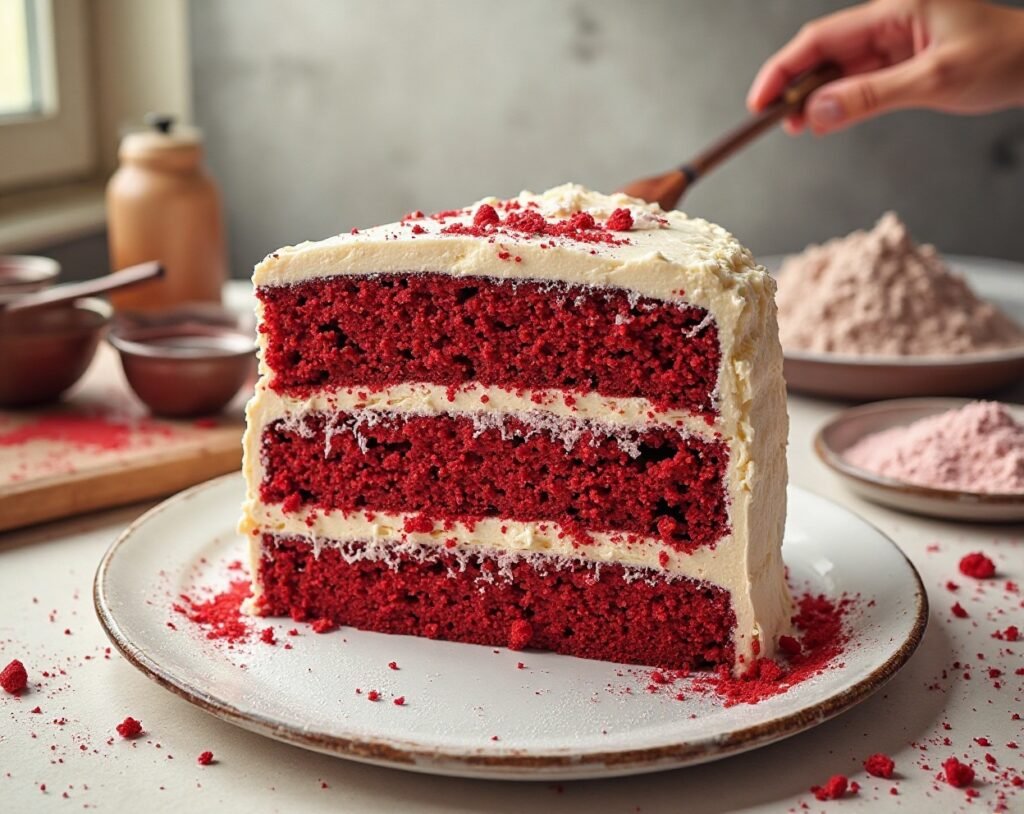
Look at this beauty a
Why This Recipe is Awesome
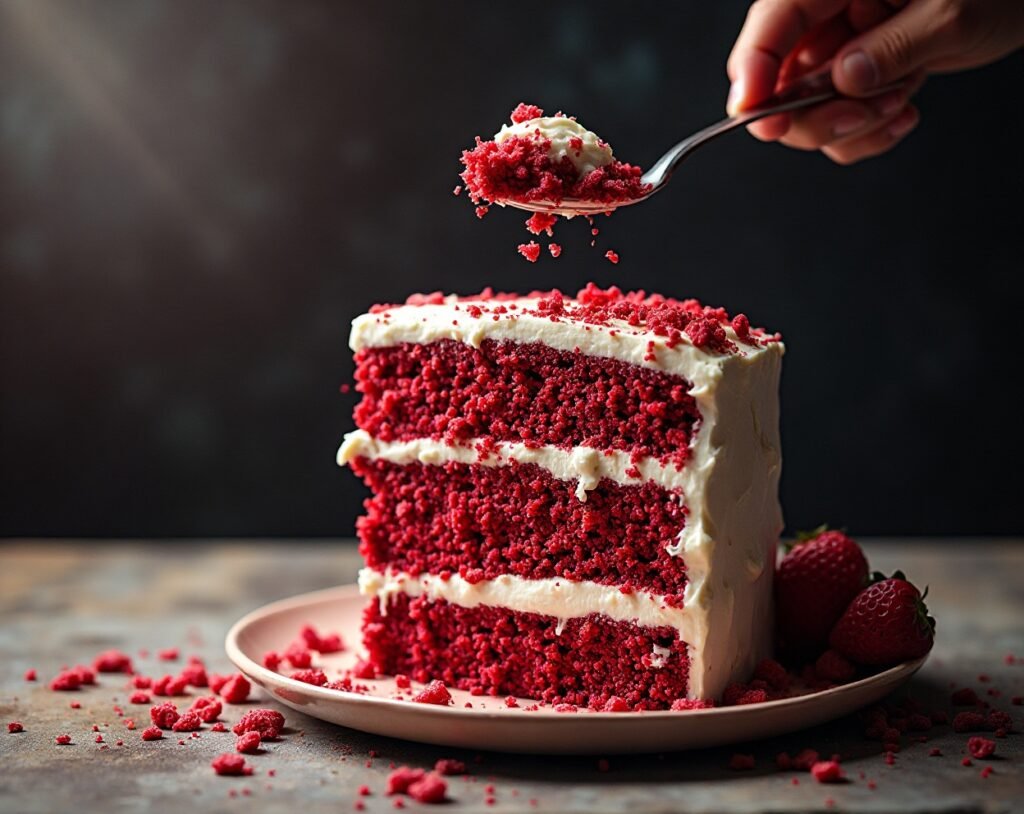
This isn’t just any red velvet cake—it’s the moist, tender, slightly tangy, perfectly balanced version that makes people go “Wait, YOU made this?!”
It’s idiot-proof (seriously, I’ve messed up way harder recipes and still nailed this one). The crumb is soft like a hug, the colour is dramatic AF, and that cream cheese frosting? It’s the tangy soulmate this cake deserves. Plus, it looks impressive without requiring a blowtorch or 47 layers. Win-win-win.
Ingredients You’ll Need
For the cake (makes two 9-inch layers of pure joy):
- 2½ cups all-purpose flour (the backbone, don’t go rogue with cake flour unless you’re feeling fancy)
- 2 tbsp unsweetened cocoa powder (just enough for that subtle chocolate vibe)
- 1 tsp baking soda (the rise-master)
- ½ tsp salt (brings out all the happy flavours)
- 1 cup buttermilk (the secret to tenderness—don’t skip it!)
- 2 tbsp red food colouring (the liquid drama queen)
- 1 tsp white vinegar (magic reaction incoming)
- 1 tsp vanilla extract (because flavour is non-negotiable)
- ½ cup unsalted butter, softened (room temp, please)
- 1½ cups granulated sugar (sweet sweet life)
- 2 large eggs (room temp for best fluff)
For the dreamy cream cheese frosting:
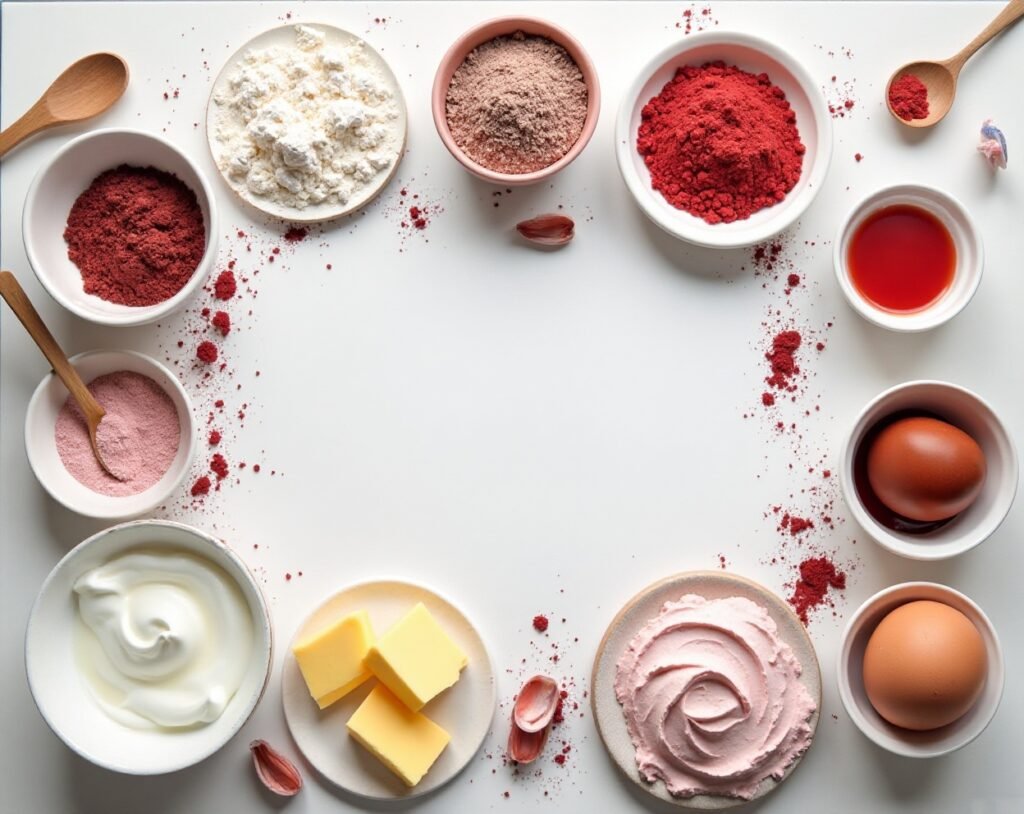
- 16 oz (2 blocks) full-fat cream cheese, softened
- ½ cup unsalted butter, softened
- 4 cups powdered sugar (sift it if you’re extra)
- 2 tsp vanilla extract
- Pinch of salt (trust me)
Step-by-Step Instructions
- Preheat your oven to 350°F (175°C). Grease and flour two 9-inch round cake pans (or line with parchment). Pro move: butter + flour = no sticking drama.
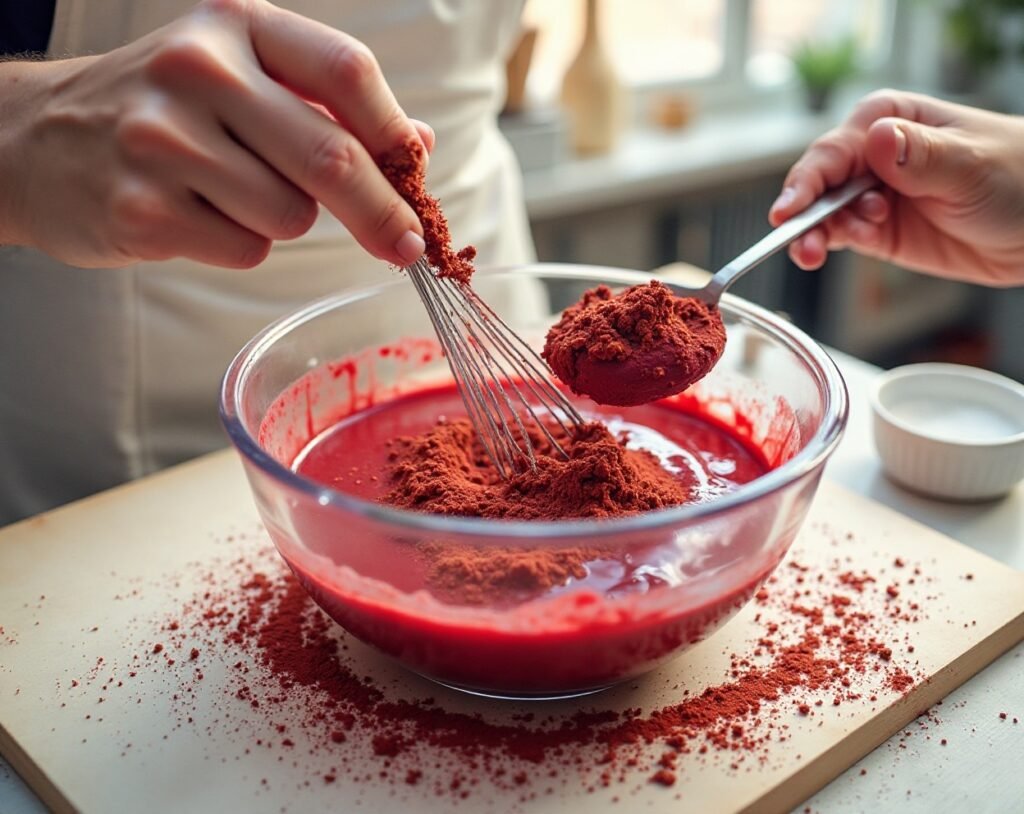
- Whisk together flour, cocoa, baking soda, and salt in a bowl. Set aside like it’s waiting for its big moment.
- In a small bowl or measuring cup, mix buttermilk, red food colouring, vinegar, and vanilla. Watch it turn magically red—science is cool.
- Beat butter and sugar together until light and fluffy (about 3-4 minutes). Add eggs one at a time, beating well after each.
- Alternate adding the dry ingredients and the red buttermilk mixture to the butter mix. Start and end with dry. Mix just until combined—don’t overmix or you’ll get tough cake (nobody wants that).
- Divide batter evenly between pans. Smooth the tops. Bake 25-30 minutes or until a toothpick comes out clean (or with a few moist crumbs).
- Cool in pans for 10 minutes, then turn out onto wire racks. Let them cool completely. (Patience is a virtue… or just eat frosting while waiting.)
- For the frosting: Beat cream cheese and butter until smooth. Gradually add powdered sugar, then vanilla and salt. Whip until fluffy and spreadable.
- Frost the cake! Stack layers with generous frosting in between, then cover the whole thing. Swirls optional but highly recommended.
Common Mistakes to Avoid
- Forgetting to preheat the oven — rookie move. Your cake will cook unevenly and hate you.
- Using cold ingredients — everything needs to be room temp for max fluffiness.
- Overmixing the batter after adding flour — tough cake = sad cake.
- Skipping the sifting of powdered sugar in frosting — lumpy frosting is not cute.
- Cutting the cake before it’s fully cool — it will crumble like your ex’s excuses.
Alternatives & Substitutions
No buttermilk? Mix 1 cup milk + 1 tbsp lemon juice or vinegar—let it sit 5 mins. Works like a charm.
Want less red? Use half the food colouring for a subtler vibe (still delicious).
Out of cream cheese? You could do a buttercream, but… why punish yourself? Cream cheese is the GOAT here.
Gluten-free? Swap in a 1:1 GF flour blend. It works surprisingly well.
Vegan? There are swaps, but this classic version is all about that dairy life. Your call!

You Should Try: Ultimate Keto Avocado Salad: Fresh, Creamy Bliss in Every Bite
FAQ (Frequently Asked Questions)
Can I make this into cupcakes instead?
Heck yes! Same batter, fill liners ⅔ full, bake 18-22 minutes. Frost and feel like a mini bakery boss.
Does red velvet cake actually taste like chocolate?
Kinde-sorta. It’s more tangy-vanilla with a whisper of cocoa. The color is the main event, flavour is the supportive bestie.
Why the vinegar + baking soda?
It’s the magic reaction that makes the cake extra tender and gives that signature velvety crumb. Chemistry, baby!
Can I use margarine instead of butter?
Technically yes… but why hurt your soul like that? Butter = better flavour and texture.
How do I store this cake?
Fridge, covered, up to 5 days (frosting needs it). Let it sit out 30 mins before eating for peak yum.
Can I freeze it?
Yes! Wrap unfrosted layers tightly, freeze up to 3 months. Frosting freezes great too. Thaw overnight in fridge.
Is it okay to eat the batter?
I mean… we’ve all done it. Just know the raw eggs risk. Your call, rebel.
Final Thoughts
There you have it—your ticket to red velvet greatness. This cake has turned many “I can’t bake” people into “Look what I made!” legends.
So grab that apron (or don’t, live dangerously), crank some music, and make this classic red velvet cake happen.
Whether you’re impressing a crush, celebrating nothing special, or just treating yourself (highly recommended), you’ve got this.
Now go forth and spread that velvety joy. You’ve earned every delicious bite.
Happy baking, friend! 🍰❤️


