

Heavenly No-Bake Oreo Cheesecake Magic Recipe
Heavenly No-Bake Oreo Cheesecake Magic Recipe
Ingredients
Method
- Mix crushed Oreos with melted butter until evenly coated.
- Press mixture firmly into a springform pan to form the crust.
- Beat cream cheese until smooth and creamy.
- Add powdered sugar and vanilla extract and mix well.
- Whip heavy cream until stiff peaks form.
- Fold whipped cream gently into cream cheese mixture.
- Stir in chopped Oreo pieces.
- Spread filling evenly over prepared crust.
- Chill cheesecake for at least 4 hours or until set.
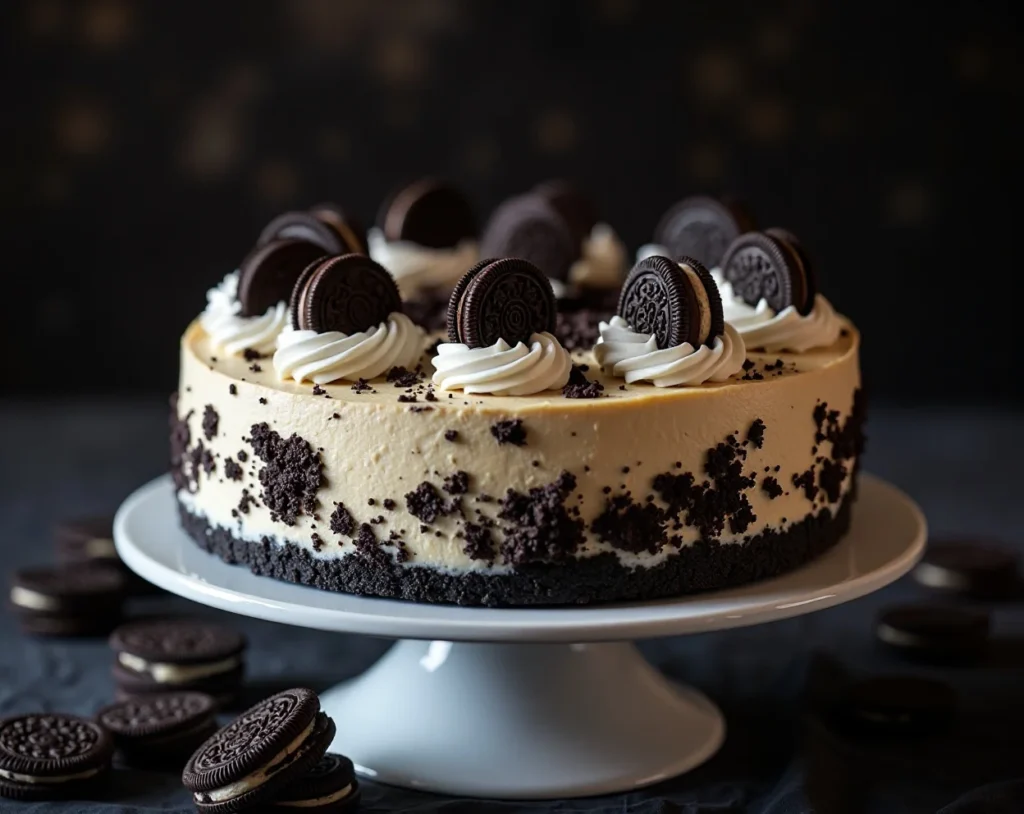
- Top with extra crushed Oreos before serving.
Notes
Chill overnight for cleaner slices and firmer structure.
Warm the knife slightly before slicing for neat cuts.
Store covered in refrigerator up to 4 days.
DID YOU MAKE THIS EASY RECIPE?
If you have, then share it with us by sending a photo. We’re excited to see what you’ve made.Okay, let’s be real for a second — who among us hasn’t stared into the fridge at 10 PM thinking, “I need something chocolatey, creamy, and involving Oreos… like, yesterday”? If that’s you (and let’s face it, it’s all of us), then buckle up, because this No-Bake Oreo Cheesecake is about to become your new best friend. No oven drama, no water bath disasters, no “did I really just spend three hours baking?” regret. Just pure, unadulterated, cookie-crunch-meets-silky-cream-cheese heaven.
Why No-Bake Oreo Cheesecake is Awesome
Listen, there are approximately 7,492 cheesecake recipes on the internet, but this one wins because it’s basically fool proof. You don’t need a fancy stand mixer (though it helps), you don’t need to temper eggs, and you definitely don’t need to pretend you know what “soft peaks” means at first glance. The beauty here is the contrast: buttery Oreo crust that’s somehow both crunchy and melt-in-your-mouth, plus a filling so creamy it should come with a warning label.
It’s the perfect make-ahead dessert — throw it together in the morning (or late-night munchies hour), let the fridge do the heavy lifting, and boom: you’re the dessert hero at dinner, parties, or just your solo Netflix marathon. And let’s talk presentation — it looks like you spent all day in the kitchen when really you spent 20 minutes of active time. Win-win-win.
Ingredients You’ll Need
No exotic ingredients here — everything is probably already hiding in your pantry or a quick corner-store run away:
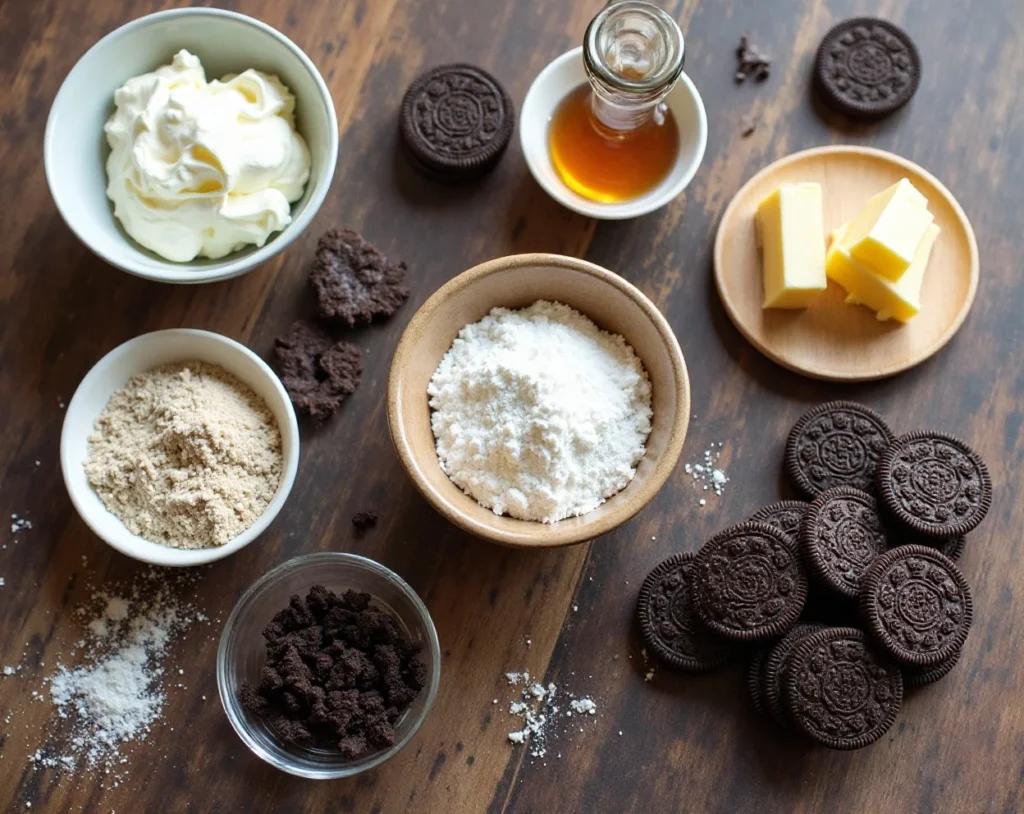
- 24 Oreo cookies (full cookies, filling and all — this is not the time to be separating creams)
- 5 Tbsp unsalted butter, melted (microwave it in 20-second bursts; don’t let it turn into a science experiment)
- 16 oz (2 full blocks) cream cheese, softened to room temp (seriously, leave it out for 45-60 minutes — cold cream cheese = lumpy sadness)
- 1 cup powdered sugar (sifted if you’re feeling extra, but honestly, who has time?)
- 1 tsp vanilla extract (the good stuff if you have it; fake is fine too)
- 1 ½ cups heavy whipping cream, very cold straight from the fridge (this is your fluff magic)
- 14–16 Oreo cookies, roughly chopped (leave some big chunks — texture is everything)
- Extra crushed Oreos for topping (go wild; make it look like a cookie crime scene)
Optional flex: a tiny pinch of salt to balance the sweetness, or a splash of chocolate liqueur if you’re feeling grown-up.
Step-by-Step Instructions
Let’s walk through this like we’re hanging out in the kitchen together — no stress, just vibes.
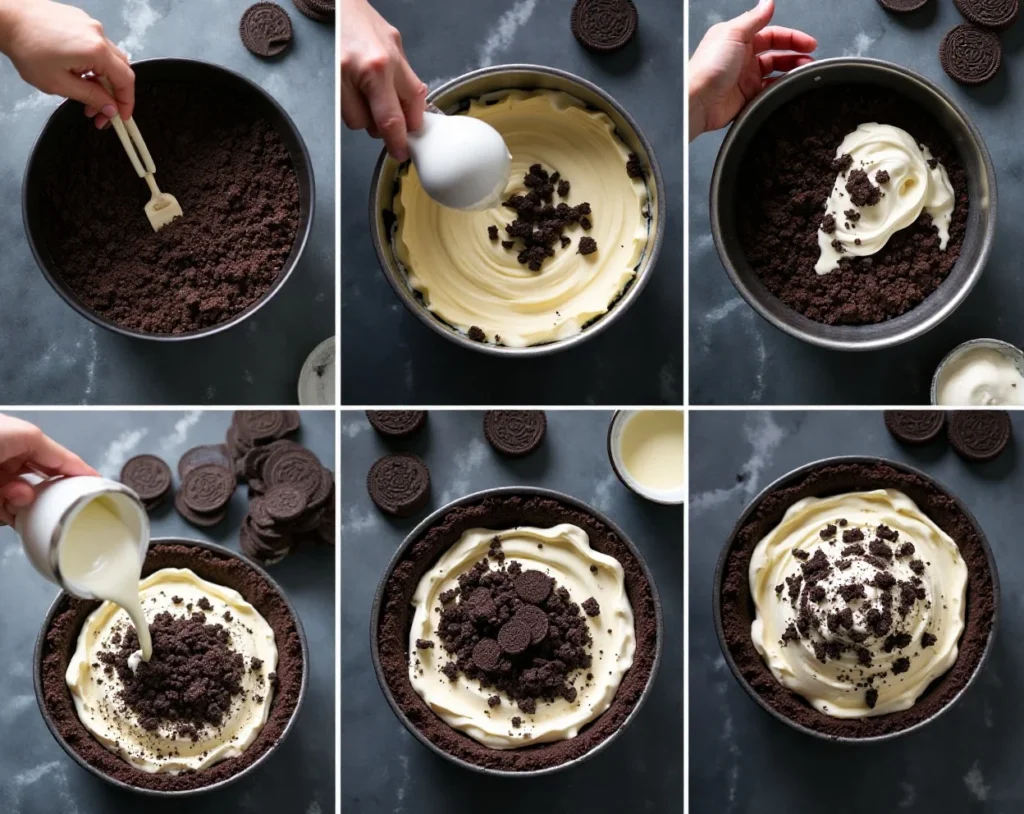
- Make the crust — Dump those 24 whole Oreos into a food processor (or zip-top bag + rolling pin aggression). Pulse/blast until you have fine crumbs. Pour in the melted butter and mix until it looks like damp beach sand. Press it SUPER firmly into the bottom (and about 1 inch up the sides) of a 9-inch springform pan. Use the bottom of a glass for max compression. Pop it in the fridge for 15–20 minutes to set.
- Beat the cream cheese base — In a large bowl, beat the softened cream cheese with a hand mixer (or stand mixer) until silky smooth — about 2 minutes. Add the powdered sugar and vanilla, then beat again until completely combined and lump-free. Scrape down the sides; nobody likes surprise chunks.
- Whip the cream — In a separate cold bowl, whip the cold heavy cream until you get stiff peaks. This usually takes 2–4 minutes. You’re looking for peaks that stand up when you lift the beaters — not soft and floppy, and definitely not butter.
- Fold it in — Gently fold about one-third of the whipped cream into the cream cheese mixture to lighten it up. Then fold in the rest carefully — use a spatula and slow, sweeping motions. You want to keep all that air in there for maximum fluffiness.
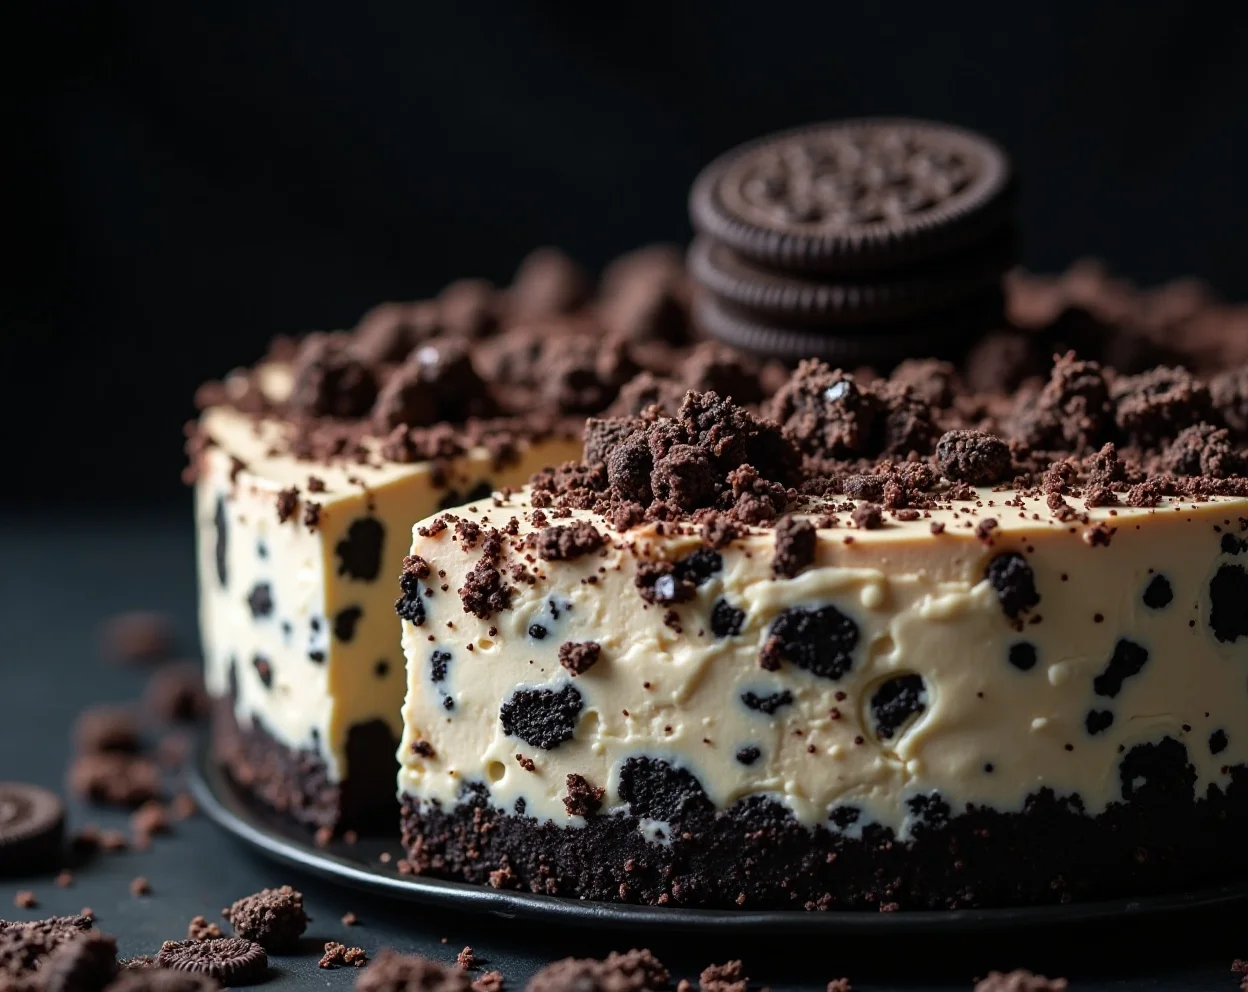
- Add the cookie chaos — Toss in your roughly chopped Oreos and fold just until evenly distributed. Those big chunks? They’re the best part — don’t pulverize them.
- Assemble — Pull the crust from the fridge, pour the filling on top, and smooth it out with an offset spatula (or the back of a spoon). Generously sprinkle extra crushed Oreos over the top for that wow factor.
- Chill — Cover loosely (so it doesn’t absorb fridge smells) and refrigerate for at least 6 hours — overnight is ideal. The longer it sits, the better it sets and the more the flavours meld.
Common Mistakes to Avoid
We’ve all been there — rookie errors happen. Here’s how to dodge the big ones:
- Cutting it too soon — I know the temptation is real, but slicing before full chill time = soup. Give it the full 6+ hours (or overnight).
- Cold cream cheese — It stays lumpy no matter how long you beat it. Room temp is non-negotiable.
- Over-whipping the cream — One second it’s perfect, the next it’s grainy butter. Watch it like a hawk.
- Weak crust — Don’t skimp on pressing it down — a crumbly crust ruins the whole experience.
- Skipping the fold — Dumping whipped cream in and stirring aggressively = flat, dense filling. Gentle folding is key.
Alternatives & Substitutions
This recipe is super flexible — make it work for you:
- No heavy cream? Cool Whip (about 2–2.5 cups) works as a shortcut. It’s not quite the same, but still delicious in a pinch.
- Lighter version — Use reduced-fat cream cheese and light Oreos. Still tastes great, less guilt.
- Gluten-free — Swap in gluten-free Oreos — same texture, same happiness.
- Mini cheesecakes — Press crust into muffin liners, divide filling among 12–16 cups. Chill 3–4 hours. Perfect for parties (and portion control… sort of).
- Extra decadent — Drizzle melted chocolate or add a layer of ganache on top.
- Flavour twist — Mix in a bit of instant coffee or peppermint extract for holiday vibes.
FAQ (Frequently Asked Questions)
Can I make this ahead of time?
Absolutely — it’s actually better 1–2 days later. Just keep it covered in the fridge.
How long does No-Bake Oreo Cheesecake last?
4–5 days in the fridge (if you can resist). After that, the crust might soften.
Can I freeze it?
Yes! Wrap tightly in plastic + foil, freeze up to 2 months. Thaw overnight in the fridge.
Do I need a springform pan?
Not strictly — a deep pie dish works, but slices might be messier. Springform is cleaner.
Why is my cheesecake runny or soft?
Usually under-whipped cream or insufficient chilling. Next time, aim for stiff peaks and overnight chill.
Store-brand Oreos — yay or nay?
Yay! They’re cheaper and taste almost identical. No shame in saving money.
Can I add fresh fruit?
Sure — strawberries or raspberries on top cut the richness nicely.
Final Thoughts
And there you have it — the ultimate lazy-yet-impressive No-Bake Oreo Cheesecake that delivers maximum flavour with minimal effort. Whether you’re feeding a crowd, treating yourself after a rough day, or just need an excuse to smash cookies, this recipe has your back.

So what are you waiting for? Grab those Oreos, crank up your favourite playlist, and get to mixing. When it’s done chilling, cut yourself a massive slice, sink into the couch, and remind yourself that sometimes the best things in life require zero baking.
You’ve earned this creamy, crunchy, chocolatey bliss. Now go make it happen — and maybe save me a slice? (Okay, fine, eat it all… I won’t tell.)
Enjoy every single bite! 🍪✨ (Word count: ~1520)


