
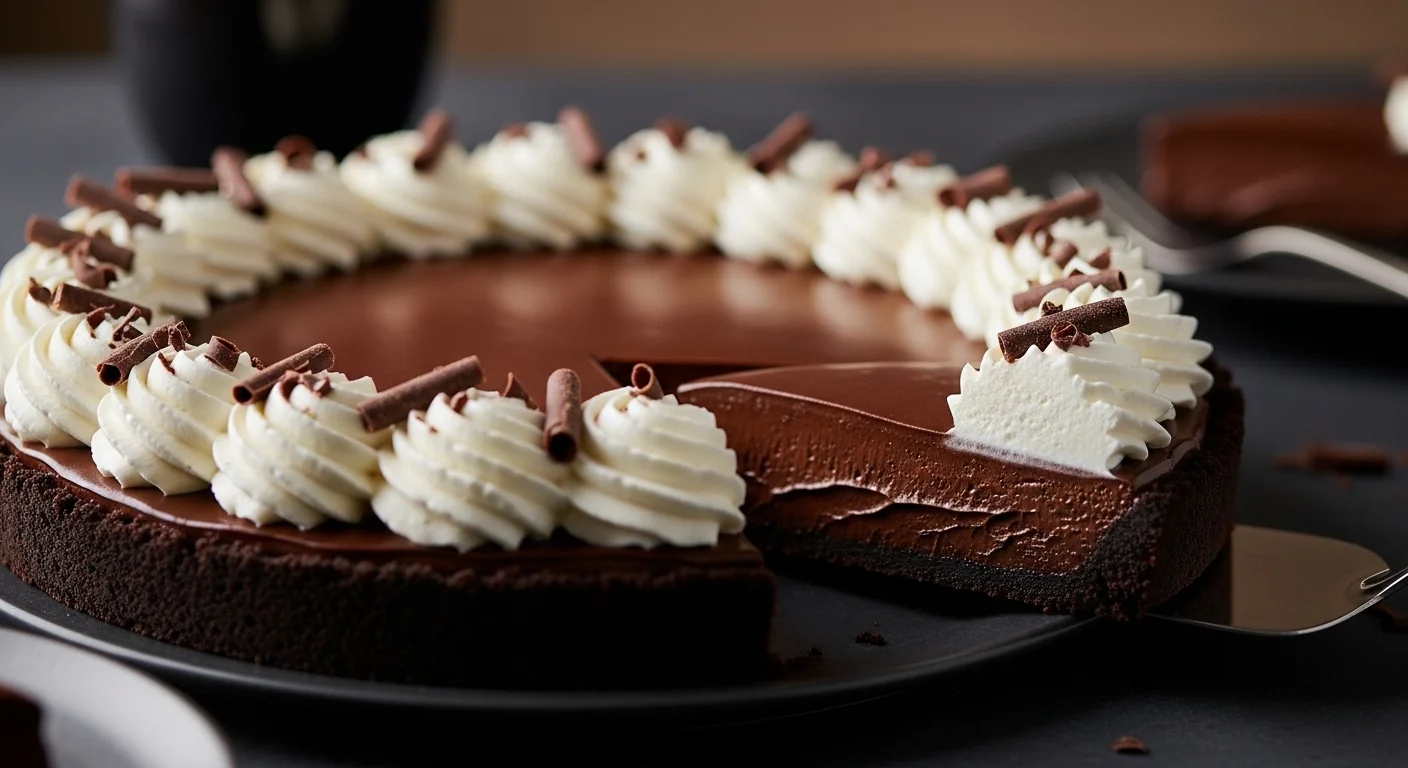
Decadent Dark Chocolate Silk Pie Bliss
Listen, sometimes you just need to dive face-first into something so rich and chocolatey that it feels like a hug from the inside out—bonus points if it involves zero guilt trips about calories. Enter Dark Chocolate Silk Pie Recipe: silky-smooth, intensely chocolatey filling that’s basically mousse pretending to be pie, topped with clouds of whipped cream. No baking the filling (yep, it’s no-bake magic after the crust), no raw egg worries in this version, just pure, melt-in-your-mouth indulgence. Who’s ready to make their chocolate dreams come true without breaking a sweat?
Why This Recipe is Awesome
This pie is the ultimate chocolate lover’s flex—deep, dark chocolate flavor without being cloyingly sweet, thanks to using good dark chocolate (think 60-70% cocoa). The texture? Silky AF—light, airy, and so smooth it practically dissolves on your tongue.
It looks fancy (Oreo crust + whipped cream swirls = insta-worthy), but it’s surprisingly straightforward—no candy thermometers or double boilers required. It’s forgiving too—even if you overwhip the cream a little, it still turns out amazing. Perfect for impressing at dinner parties, Valentine’s, or just treating yourself on a random Wednesday. One slice and you’ll wonder why you ever settled for regular chocolate pie.
Ingredients You’ll Need
Simple lineup—no weird stuff:
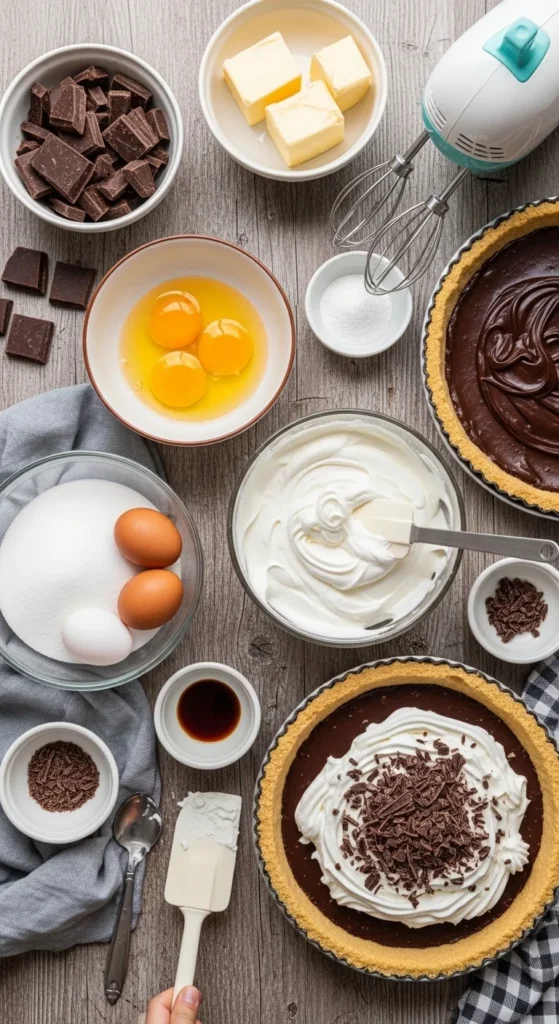
- 1 pre-baked 9-inch pie crust (Oreo cookie crust is killer—crush 20-25 Oreos + 5 Tbsp melted butter, press in, bake 8 min at
- 350°F; or use graham or plain pastry)
- 8 oz (about 227g) dark chocolate (60-70% cocoa—chop it up; bittersweet bars melt best, skip chips if possible)
- 1 cup (2 sticks) unsalted butter, room temperature (soft but not melted—key for fluffiness)
- 1 1/3 cups granulated sugar (or a bit less if your chocolate is super dark)
- 4 large eggs (room temp—helps everything blend smoothly)
- 2 tsp vanilla extract (the real stuff)
- 1 1/3 cups heavy whipping cream, cold (for whipping into the filling)
- For topping: 1 cup heavy cream + 2-4 Tbsp powdered sugar + 1 tsp vanilla (whipped cream heaven)
- Optional: chocolate shavings or curls for that pro look
That’s it. Chocolate, butter, sugar, eggs, cream—classic silk pie squad.
Step-by-Step Instructions
- Start with your cooled crust. If making Oreo, do that first and let it chill.
- Melt the dark chocolate gently (microwave in 20-sec bursts or double boiler), stir until smooth, then cool slightly so it doesn’t cook the eggs later.
- In a large bowl, beat the room-temperature butter and sugar with an electric mixer 3-5 minutes until light and fluffy—like you’re whipping it into submission.
- Beat in the cooled, melted chocolate and vanilla until fully combined. Add eggs one at a time, beating 5 full minutes after each (yes, seriously—this is what makes it silky and airy). The mixture gets super light and mousse-like.
- In a separate bowl, whip the 1 1/3 cups cold heavy cream to stiff peaks (don’t overdo it or it’ll turn buttery). Gently fold the whipped cream into the chocolate mixture in batches—keep it light to preserve the airiness.
- Pour into your crust, smooth the top, and chill at least 4 hours (overnight is best—patience pays off here).
- Whip the topping cream with powdered sugar and vanilla to soft peaks. Spread or pipe on top, then shower with chocolate shavings.
Slice cold for clean cuts. Try not to moan too loudly when you take that first bite.
Common Mistakes to Avoid
- Using cold butter — it won’t cream properly with sugar; room temp or bust.
- Rushing the egg-beating step — shortchanging the time = dense filling instead of silk. Set a timer.
- Overheating the chocolate — it seizes or gets grainy. Low and slow.
- Not chilling long enough — runny pie disaster. Give it time to set.
- Overwhipping the cream — turns grainy or separates. Stop at stiff peaks.
Skip these, and you’re golden (or chocolatey).
Alternatives & Substitutions
- Gluten-free? Use GF Oreos or cookies for the crust—tastes just as good.
- No dark chocolate? Bittersweet works, or mix semi-sweet with unsweetened for depth. IMO, darker = better intensity.
- Egg concerns? This version cooks the eggs via long beating (or some recipes heat the sugar/eggs first), but if you’re worried, look for pasteurized or skip to a cooked custard base.
- Dairy-free? Tougher, but vegan dark chocolate + coconut cream + vegan butter can approximate it—texture changes a bit.
- Want mocha vibes? Add 1-2 tsp espresso powder to the chocolate melt.
- Super adaptable—tweak the chocolate percentage to your sweet spot.
FAQ
Can I make this ahead?
Absolutely. Make it 1-2 days early—flavors deepen in the fridge. Just add whipped topping right before serving.
Is the filling safe with raw-ish eggs?
In many classic versions, long beating incorporates air and “cooks” via friction, but if nervous, use pasteurized eggs or a heated custard method.
Why is my filling grainy?
Sugar didn’t fully dissolve, or the chocolate was too hot. Beat longer next time and cool the chocolate properly.
Can I use chocolate chips?
Technically, yes, but bars melt more smoothly. Chips have stabilizers that can make it less silky.
Freeze-friendly?
Yep! Freeze whole (no topping) up to 1 month, thaw in fridge overnight. Top fresh.
How do I get perfect chocolate curls?
Use a veggie peeler on a room-temperature chocolate bar—easy swirls every time.
Too chocolatey? Can I lighten it?
Add more whipped cream or use 50-60% chocolate instead of 70%. Still rich, but milder.
You can also try this lovely recipe: Maple Bourbon Pecan Pie Heaven Recipe
Final Thoughts
There you have it—Dark Chocolate Silk Pie that’s pure, velvety decadence without the bakery price tag or stress. It’s the kind of dessert that makes people close their eyes and sigh, and you get all the credit for minimal effort.
Grab that dark chocolate, whip up some magic, and chill. Share a slice (or don’t—self-care counts). Either way, you’ve just created something dangerously delicious. Go treat yourself; life’s too short for boring pie. 🍫🥧
Decadent Dark Chocolate Silk Pie Bliss
Ingredients
Method
- Ensure crust is pre-baked and cooled.
- Melt dark chocolate gently and let cool slightly.
- Beat room-temperature butter and sugar 3–5 minutes until light and fluffy.
- Mix in melted chocolate and vanilla until smooth.
- Add eggs one at a time, beating 5 minutes after each until silky and mousse-like.
- Whip 1 1/3 cups heavy cream to stiff peaks and fold gently into chocolate mixture.
- Pour filling into crust, smooth top, and chill at least 4 hours or overnight.
- Whip topping cream with powdered sugar and vanilla, spread or pipe on pie, and garnish with chocolate shavings.
- Slice cold for clean cuts and serve.


